There are many reasons to like unRAID, one of them is it’s ability to easily add drives of mismatched size as and when they become available to you. I had followed this principle over the years and ended up with a hodge-podge of drives. As was my want I’ve decided to remove all 6 (yes 6) drives at once from my array and replace them with 2x 3TBs.
This guide will attempt to make the process of removing drives from unRAID a SIMPLE process, something which much of the information around thus far has failed to do. I’ll include screenshots where required, and will always respond to comments below. With that in mind, let’s get cracking!
Identifying the drive(s) to be removed
So I’ll be focusing on only one drive here, but you can easily repeat these steps for as many drives as you want. But first, a disclaimer.
During this process your array will require parity to recalculated at some point, thus leaving your array unprotected for some time (maybe up to 12 hours). Proceed at your OWN RISK!
Before you begin I STRONGLY advise you to take a screenshot of your drive configuration as this will prove a useful reference throughout this guide. The drive I will use during this guide is ‘disk 8’.
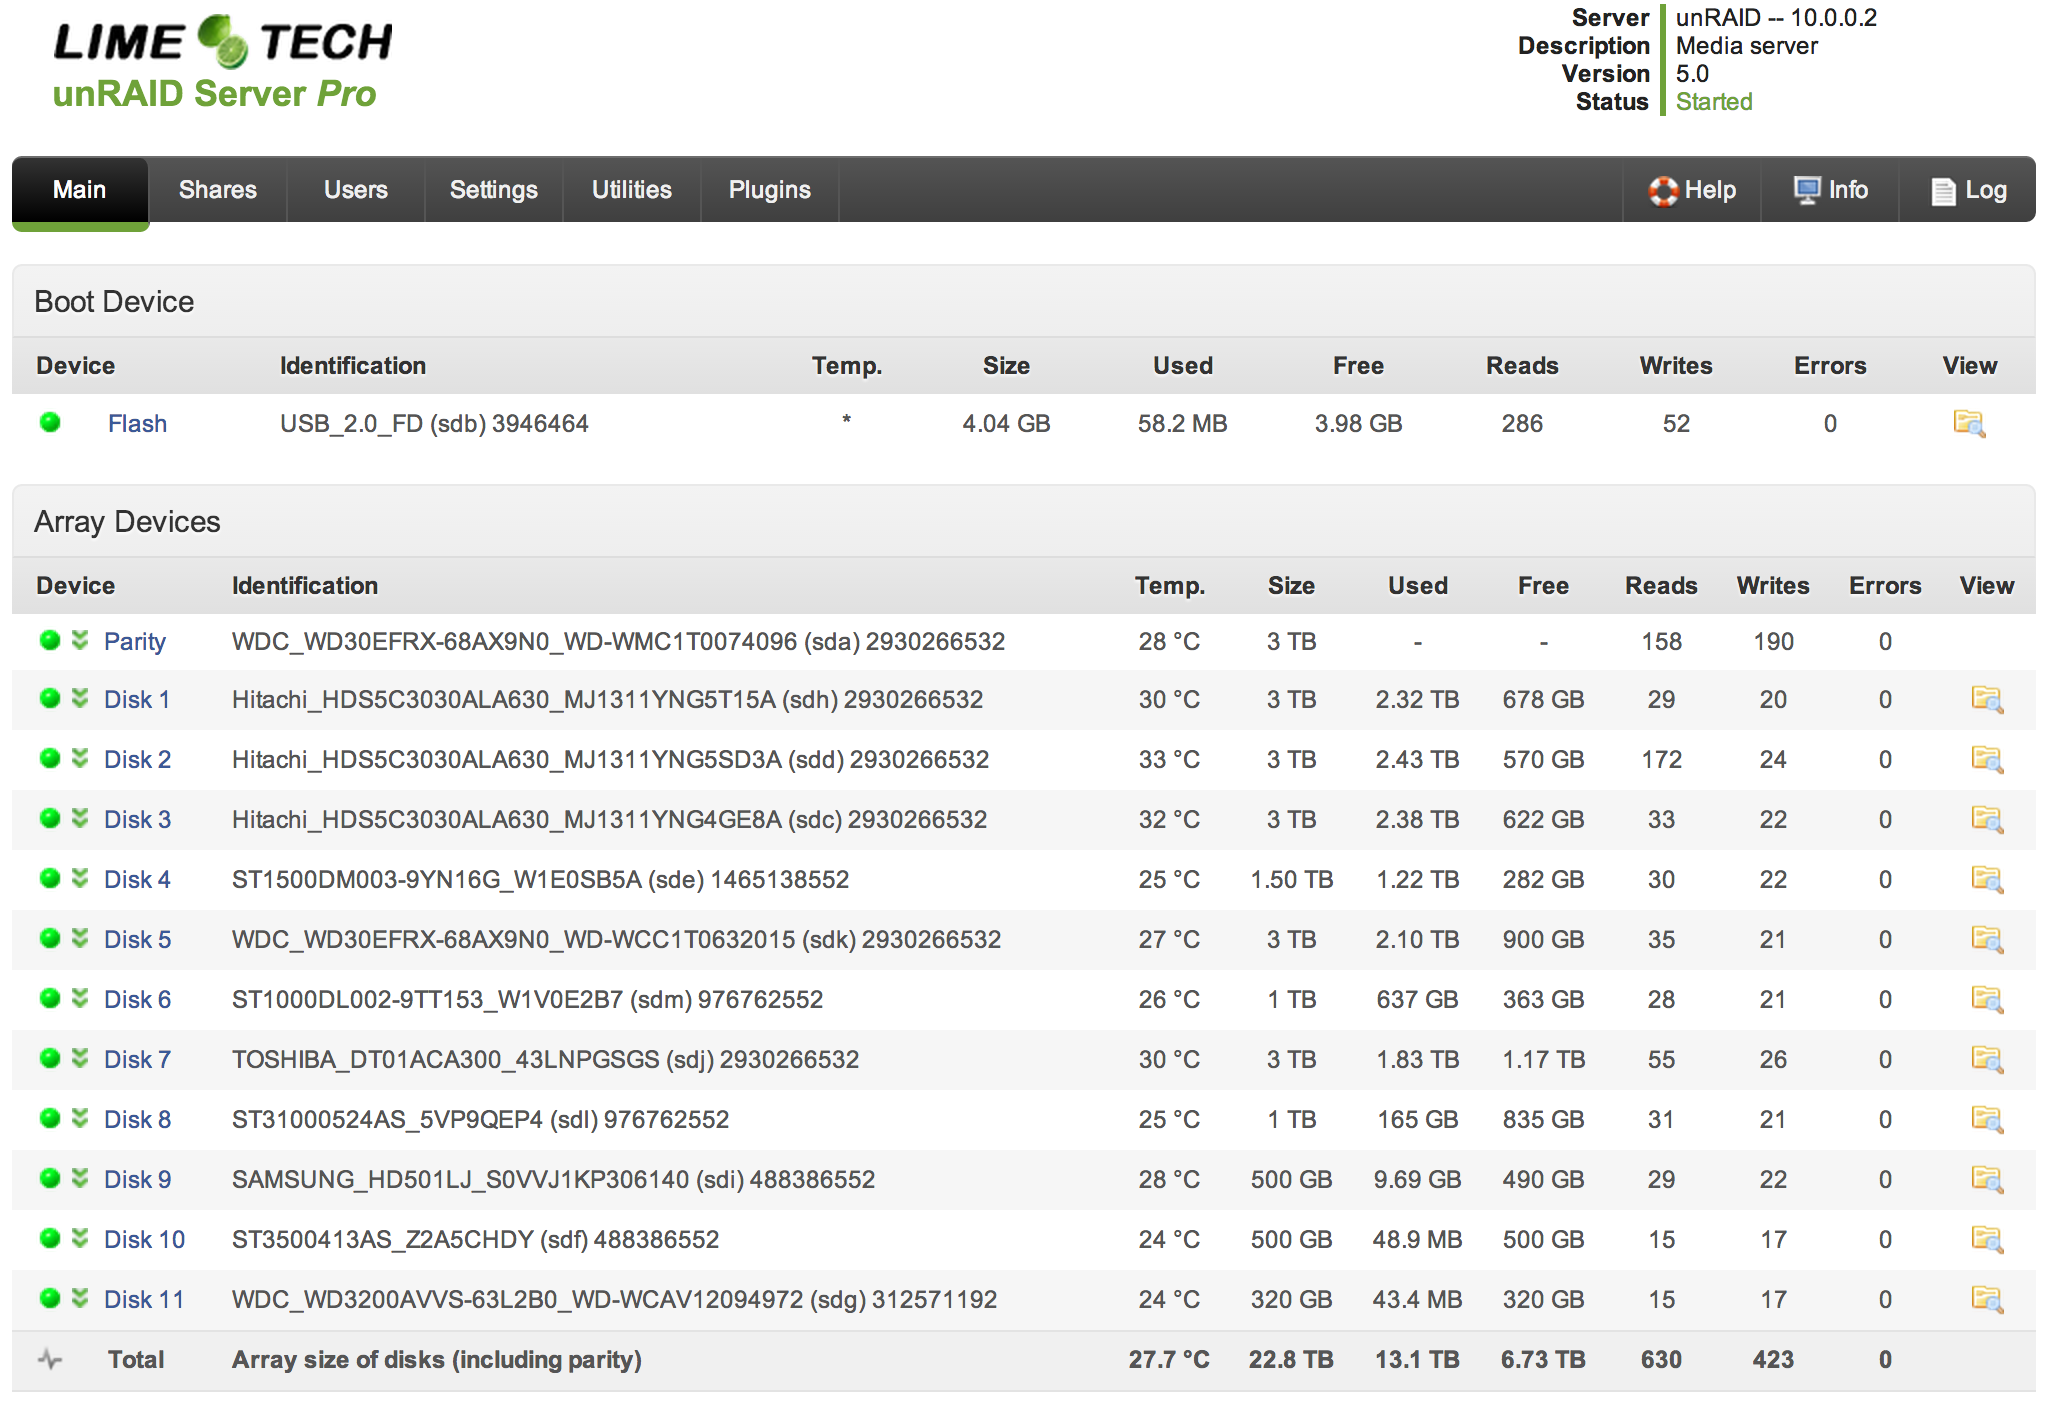
Now then, this is where we remove the drives from the array. Using your unRAID web interface go to Utilities > New Config > Check the box and reset your drive config.
What this does is reset the drive list that unRAID uses. If you go back to the main array page now, you’ll see that your drives are ALL unassigned. No data has been lost or deleted at this point, so if you wish you can reassign all drives as they were and restart the array with valid parity.
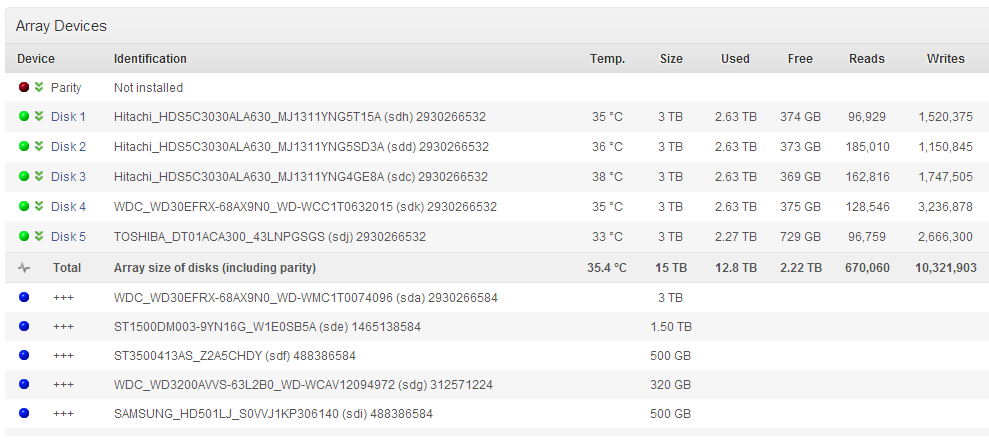
Ok, next step is to reassign the drives you want to KEEP only. Leave the drives to be removed unassigned, start the array and let the parity resync complete (this can take a while). Optionally, you can do the parity resync at the end – it’s up to you (it’s what I did).
Start the array and it should look something like this now.
Hopefully this make sense, but I’ll recap just incase. We have:
- reset the drive assignments that unRAID uses and created a new config
- added the drives we want to KEEP to a ‘new’ array
- not deleted any data
- *optionally recreated Parity
Mount the removed drive(s)
I’m presuming that the drives you’ve removed have data on them that you want to be kept safe, if so read on.
Log in to telnet, ssh or console (preferred) on your unRAID box. Then using your old array screenshot as a guide find the ‘dev name’ of your disk, for example disk 8, was (sdl).
Now we want to create a mount point for the old drive under /mnt and mount it!
mkdir /mnt/olddrive
mount /dev/sdl1 /mnt/olddrive
Your drives most likely have only one partition (that’s the number after sdl refers to below) but if you want to check, run fdisk -l. My output is below purely for reference.
Disk /dev/sdl: 1000.2 GB, 1000204886016 bytes
1 heads, 63 sectors/track, 31008336 cylinders
Units = cylinders of 63 * 512 = 32256 bytes
Sector size (logical/physical): 512 bytes / 512 bytes
I/O size (minimum/optimal): 512 bytes / 512 bytes
Disk identifier: 0x00000000

   Device Boot      Start         End      Blocks   Id  System
/dev/sdl1               2    31008336   976762552   83  Linux
You may repeat this as many times as you like so as to mount each old drive, but you’ll need a separate mount point for each to mount them concurrently.
Copying across the data using MC
MC stands for Midnight Commander and is built-in to unRAID. To check that you’ve mounted the right drive to right place, run
df -hThe output from this command is very useful and gives you an idea of how much data there is to move. See below:
root@unRAID:/mnt# df -h
Filesystem            Size  Used Avail Use% Mounted on
tmpfs                 128M  488K  128M   1% /var/log
/dev/sdb1             3.8G   48M  3.8G   2% /boot
/dev/md1              2.8T  2.4T  349G  88% /mnt/disk1
/dev/md2              2.8T  2.4T  348G  88% /mnt/disk2
/dev/md3              2.8T  2.4T  344G  88% /mnt/disk3
/dev/md4              2.8T  2.4T  350G  88% /mnt/disk4
/dev/md5              2.8T  2.2T  635G  78% /mnt/disk5
shfs                   14T   12T  2.0T  86% /mnt/user
/dev/sdl1             932G  594G  339G  64% /mnt/olddrive
So now we know that there is 594GB of data on my old drive, I want to transfer the whole lot. Fire up midnight commander with a simple command.
mc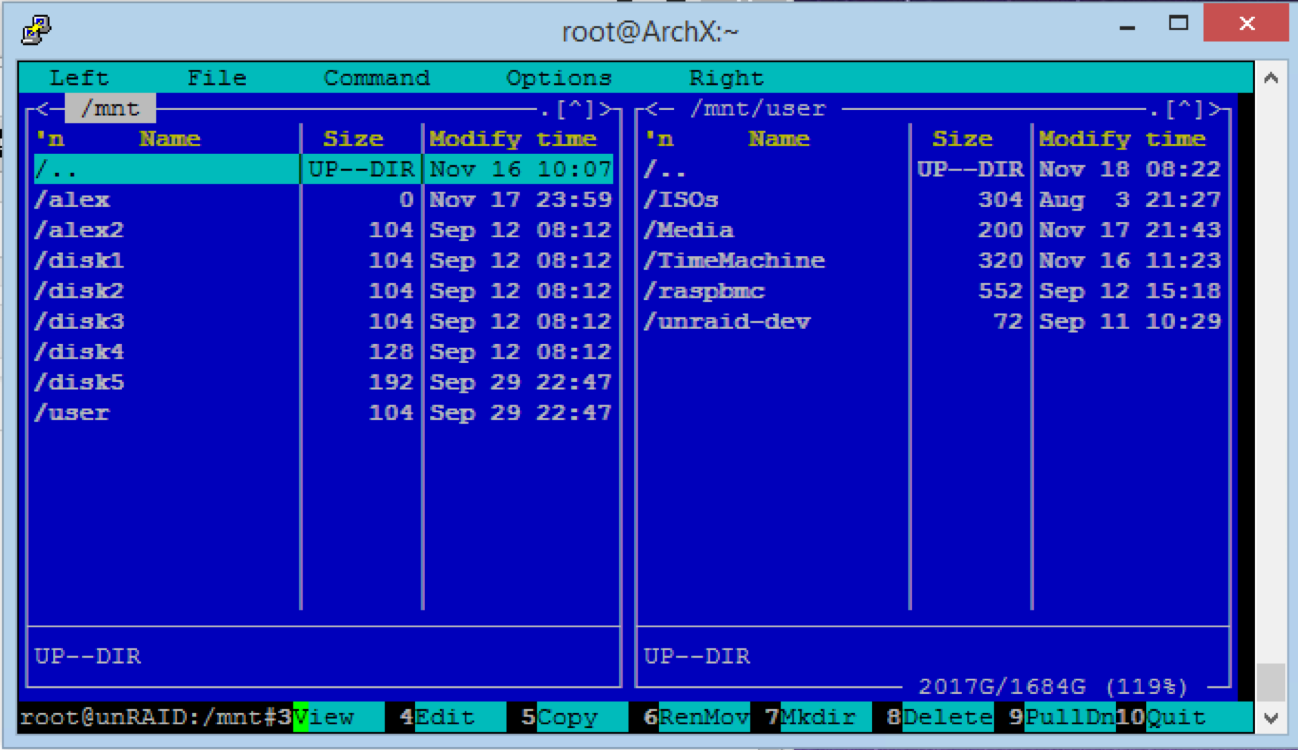
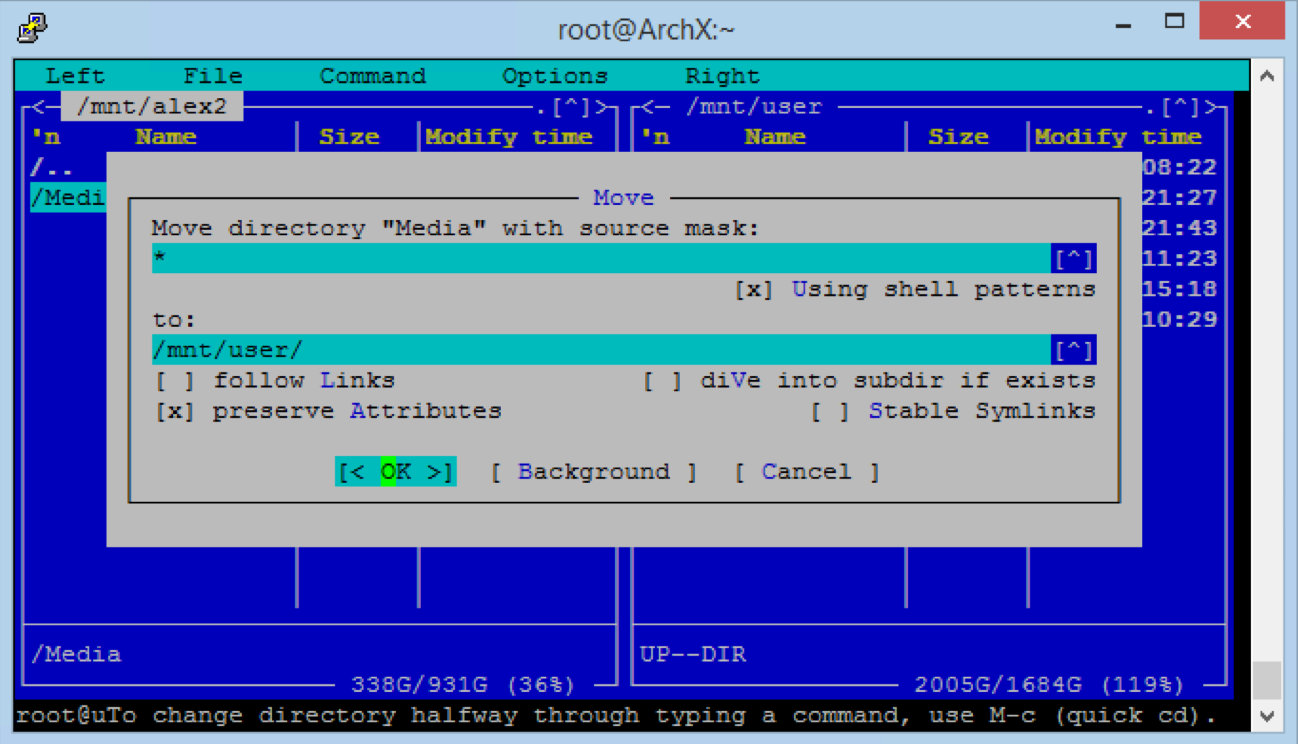
Navigate user the arrows and enter keys to /mnt/olddrive under which will be the directory structure you should recognise from unRAID. I store everything in one folder called /Media so on the left pane highlight the folder you want to move. Then in the right pane navigate to /mnt/user and go back to the left pane.
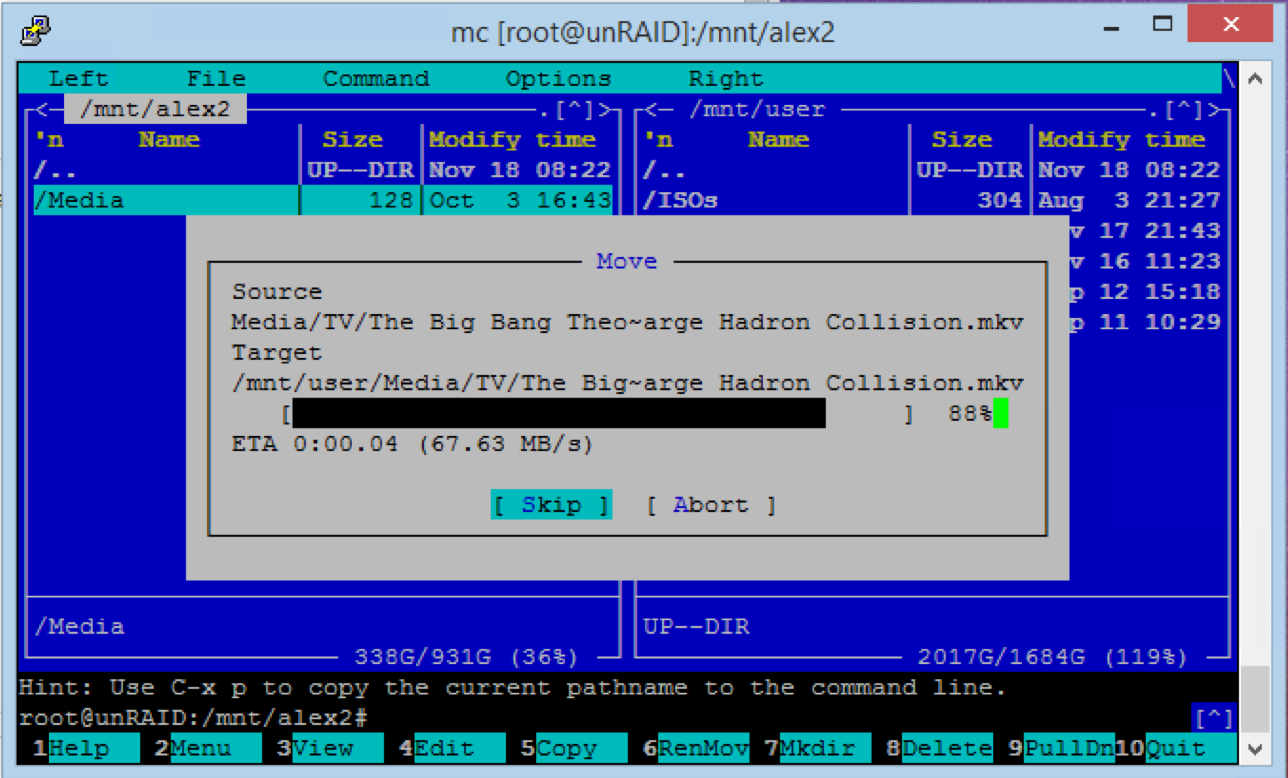
Then, press F6 (this will move all data, only deleting from old drive upon successful completion), selecting preserve attributes is a personal choice but I like timestamps. Kind of hard to explain like this but hopefully this next screenshot helps…
This process will likely take some time and will vary drastically depending on the amount of data to be transferred. The ‘in progress’ screenshot is below
So to recap this section we have
- mounted the removed drive (referred to as olddrive) to /mnt/olddrive
- checked we’ve mounted the right drive to the right spot with ‘df -h’
- used mc to transfer all the data back to /mnt/user (which is the array).
Finish and tidy up
Once you’ve finished transferring stuff unmount the old drive with umount below. Close mc and cd (change) out of the that directory if it doesn’t work and try again.
umount /mnt/olddriveThat’s it. Repeat as necessary for each drive and you’re good to go.
It’s not as complex as this guide makes it seem and you’ll really get the hang of it within a couple of go’s! Thanks for reading.
Please let me know if there’s anything I can change in this guide to make it easier – it’s aimed at the beginner…