This article will detail the steps required to passthrough your GPU to a guest VM which will in our case be a Windows 10 VM used for gaming. Yes, this is the exact same technology made popular by Linus on his LinusTechTips YouTube channel in the seven gamers, one CPU video. In this video Linus used unRAID but this guide will show how to perform this process without requiring a proprietary software license - we at LinuxServer.io are keen to promote Free and Open Source Software whenever possible.
By the end of this guide you will have a Linux based host system capable of running games under Windows at almost native performance. This guide assumes you are comfortable with installing and setting up Arch - if you're not install Antergos and enjoy.
Note this article is unfinished and I don't intend to finish it soon however, it's sat in drafts for ages and I figure it'll help more people (even half finished) if it's published!
1. Why Arch?
We are at the cutting edge of what is possible with this technology so it makes sense to have the freshest packages available to use from the repos. All of what is described in this article is possible on any Linux distro but you may have to compile the latest versions of libvirt and qemu to get support for device resetting, not mention a recent kernel which contains many fixes to KVM itself.
I'd be interested to hear from folks who have done this on other distros as to the accuracy of my above statements these days.
2. Hardware
Hardware compatibility will make or break this setup thanks to the requirements passthrough places upon an Intel technology called vt-d (AMD call it AMD-V). In the time before Skylake this meant you must have a 'non-K' CPU, but with Skylake any Intel CPU will do. You can check for vt-d support under Linux by performing:
# check for vt-d capability

$ dmesg|grep -e DMAR -e IOMMU
[    0.000000] DMAR: IOMMU enabled
This Arch wiki article has great information on hardware compatibility that far exceeds what I could write about, if you're having issues give it a read. Do note that not only your CPU but also your motherboard must support vt-d for this to work.
You can find the exact hardware I used for my system in the Appendix at the end of this article.
3. Setting up passthrough
I have scripted all the major parts of my install, I love automation. You can find the scripts on Github here. I would probably suggest forking the repository and customing the scripts as you require - there are a bunch of packages for me, my custom git config, etc. If git is alien to you, don't let it be any longer - it's dead simple and you'll wonder why you didn't backup your configs before once you start!
The most important script is vfio.sh. This walks the user through downloading the required OVMF firmware, entering your vfio-pci device ids and the setup of qemu / libvirt the foundations of the entire system.
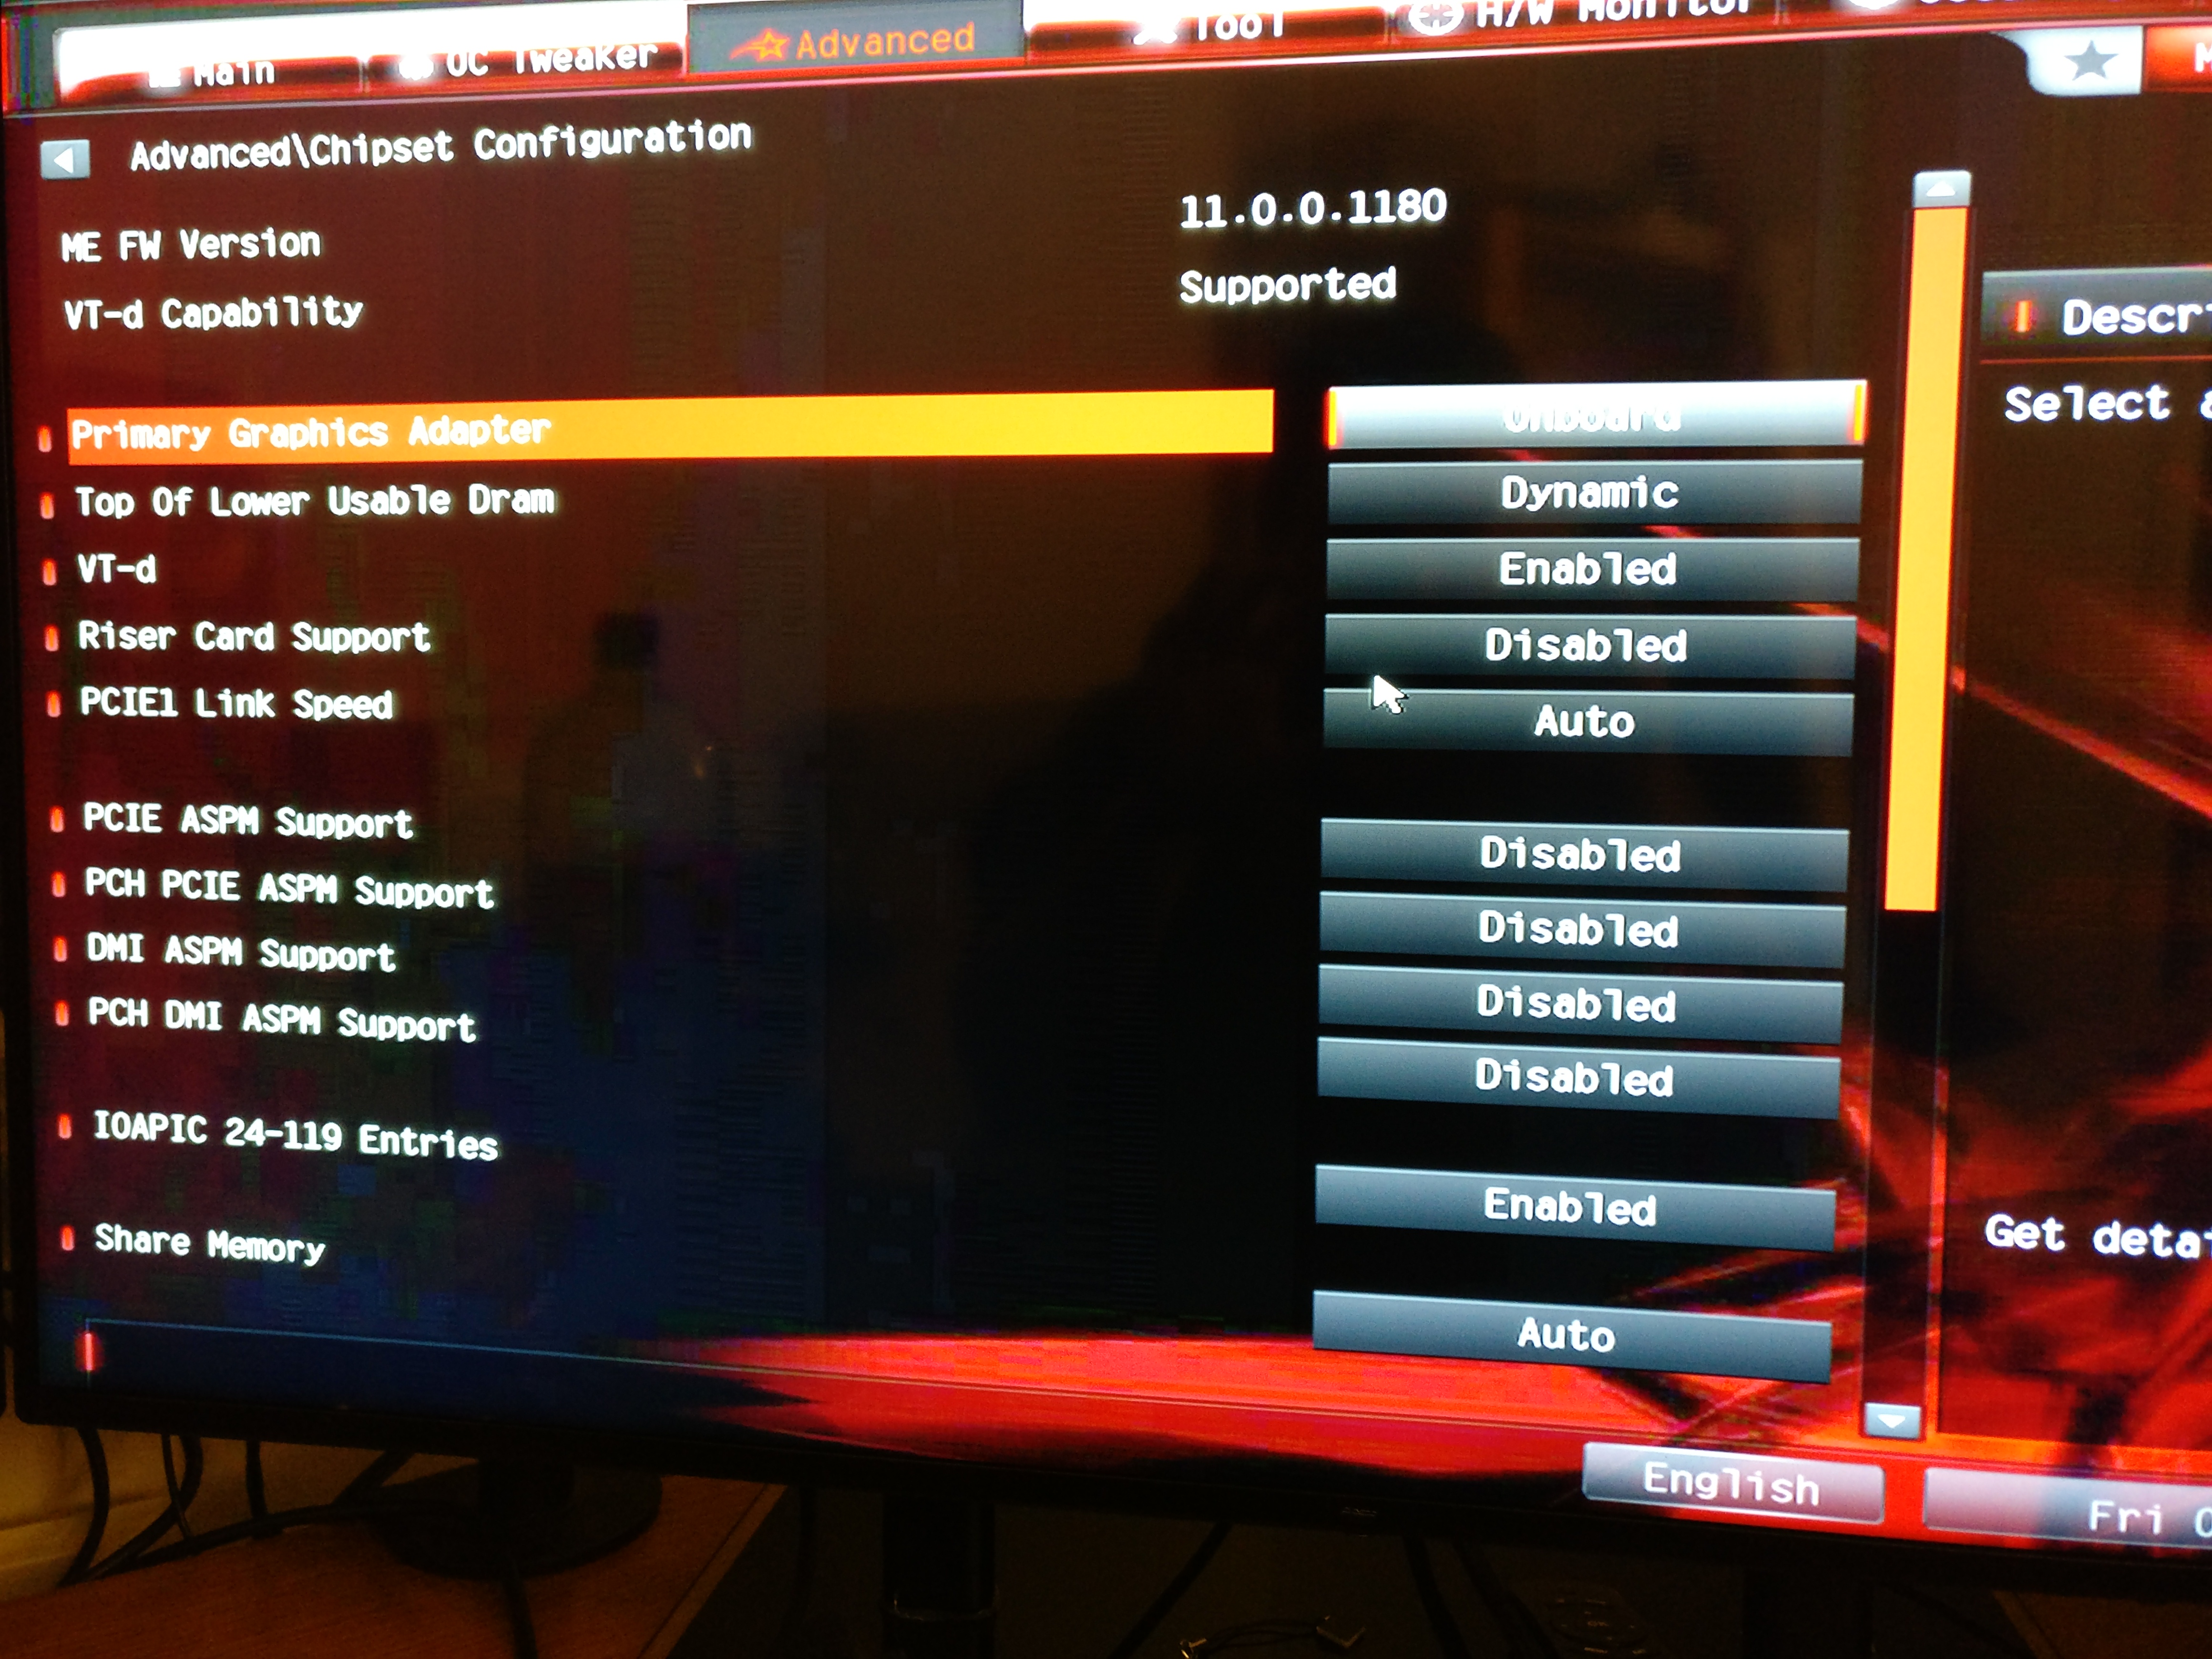
In your BIOS or UEFI firmware look for the option to choose the option to enable 'onboard graphics' as the default. This will allow you to use the outputs from your motherboard to power the Linux host portion of your setup saving the GPU outputs for your guest VMs.
n.b. the following 3.x sections explain the vfio.sh scripts actions - skip if you ran the script already
3.1 Packages
This guide was written using qemu-2.7.0-2. You can check your installed version of qemu using:
$ pacman -Q qemu
qemu 2.7.0-2
New versions of qemu introduce headline features. The 2.7 release added support for Intel Graphics VFIO (passthrough) amongst many features, so do pay close attention to your qemu version.
Other packages you might like to install are:
pacman -Sy rpmextract synergySynergy is optional but is very useful to share keyboard and mouse functionality with your guest VMs simply by moving your mouse to edge of the screen. It's great and comes highly recommended by me!
3.2 User setup
Add your user to libvirt group with usermod -aG libvirt username
3.3 Download EDK2 UEFI firmware
To enable your graphics card to 'reset' when the guest VM boots and reboots without restarting the host system your card must support UEFI BIOS. Visit tianocore to find out more.
Download the UEFI firmware from https://www.kraxel.org/repos/jenkins/edk2/. Look for the x64 file (usually second from bottom at 7mb). Once downloaded use rpmextract thus:
rpmextract.sh edk2.*.rpm
/usr/share/edk2.git
cp -R usr/share/* /usr/share/edk2.git
The above commands extract the firmware and move it to the correct place virt-manager (more on that later) and qemu to find it. Refer back to this section and double check your paths if you cannot select a UEFI bios for your VM later on in virt-manager.
3.4 PCI Device IDs
Now it's time to select the actual devices you want to passthrough and block them from the host system so it's available for the VMs to use. List your IDs with:
$ lspci -nn|grep -iP "NVIDIA|Radeon"
01:00.0 VGA compatible controller [0300]: NVIDIA Corporation GK110 [GeForce GTX 780 Rev. 2] [10de:1007] (rev a1)
01:00.1 Audio device [0403]: NVIDIA Corporation GK110 HDMI Audio [10de:0e1a] (rev a1)
In the above example my device IDs are 10de:1007 and 10de:0e1a respectively. Put these values into /etc/modprobe.d/vfio.conf so it looks like this (there might not be anything else in this file - if it doesn't exist, create it):
options vfio-pci ids=10de:1007,10de:0e1aSave your file and add the following modules to /etc/mkinitcpio.conf, then run mkinitcpio -p linux:
MODULES="vfio vfio_iommu_type1 vfio_pci vfio_virqfd"Reboot, then run lspci -k and look for vfio-pci under 'Kernel drive in use'.
01:00.0 VGA compatible controller: NVIDIA Corporation GK110 [GeForce GTX 780 Rev. 2] (rev a1)
    Subsystem: eVga.com. Corp. Device 3787
    Kernel driver in use: vfio-pci
    Kernel modules: nouveau
01:00.1 Audio device: NVIDIA Corporation GK110 HDMI Audio (rev a1)
    Subsystem: eVga.com. Corp. Device 3787
    Kernel driver in use: vfio-pci
    Kernel modules: snd_hda_intel
If you see vfio-pci congratulations, you're pretty close now.
Note this article is unfinished and I don't intend to finish it soon however, it's sat in drafts for ages and I figure it'll help more people (even half finished) if it's published!
Appendix A
Three years ago I wrote my first post on this blog detailing how to compile a custom kernel for Xen on Ubuntu 13.04 - wow how times have changed. Back then you needed an AMD GPU, custom kernels and even then it never quite worked properly or reliably. The writing of this guide is culmination of a personal 3 year journey which has led me to a dream job as a DevOps engineer, gained me an MSc in Computer Science and allowed me to meet some truly wonderful people with whom I run this site. I hope your journey of discovery is half as fun as mine.
Appendix B
The hardware used in this build was:
- CPU - Intel i7 6700k
- Motherboard - ASRock Z170 ITX Gaming blah
- RAM - 32gb DDR4
- GPU - Nvidia EVGA GTX 780 SC
- The rest is unimportant :)