
unRAID has long had the capability to integrate itself into Active Directory for centralized permission and user management but this process has never been fully documented. After lots of searching around on the forums and PMing a few users I’ve consolidated my findings into this post. I am also assuming you already have a Window Server setup with: DNS and Active Directory (AD) roles, and a functioning domain.
Overview
- Setup unRAID network settings
- Join unRAID to an active domain
- Create groups in domain for centralized management
- Set permissions on files
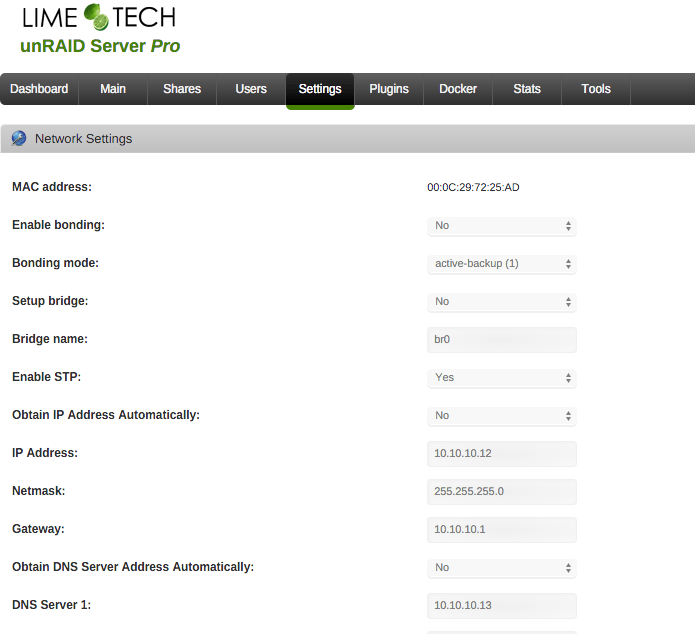
Network Settings
unRAID needs to be pointed at your Windows Server that runs DNS and AD. This is done through the unRAID WebGUI under Settings -> Network Settings . Update the DNS Server 1 box with the IP Address of your DNS server.
Join to Domain
Now that we have DNS setup we can join unRAID to the domain. Stop the array so that we can change the SMB settings to AD from the Main page. Next, in the unRAID WebGUI navigate to Settings -> SMB and change the dropdown to (Yes – Active Directory) and press “Apply”.
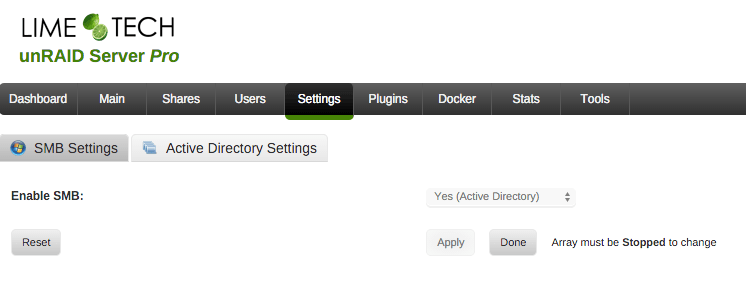
Next we will go to the Active Directory Settings tab in that same page. I am using the Microsoft domain info, change to your domain info.
- AD domain name (FQDN): CONTOSO.COM
- AD short domain name: CONTOSO
- AD account login:
- AD account password:
Press Join and you should see the text change from “Not Joined” to “Joined”.
- AD initial user:
- AD initial group:
I used my everyday AD login account as the initial owner and Domain Admin as the initial group (I know thats lazy) and press Apply.
Go ahead and start the array. The default permissions are now that all Domain Users have RW access to every file, we will update that in the next step.
Create Groups in AD
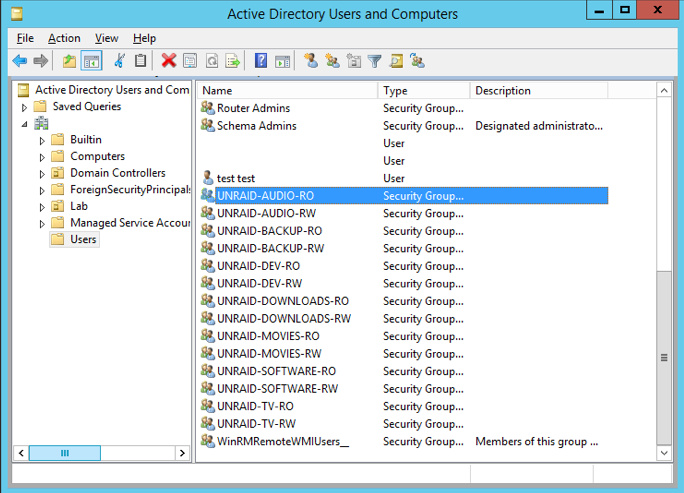
From the recommendation of Korpo53 on the unRAID forums we are going to make an AD Group for RO (Read Only) and RW (Read/Write) for every share on unRAID so that you can manage everything in AD without changing file permissions every time. You can see my naming scheme of to the right. I chose to do UNRAID--
File Permissions
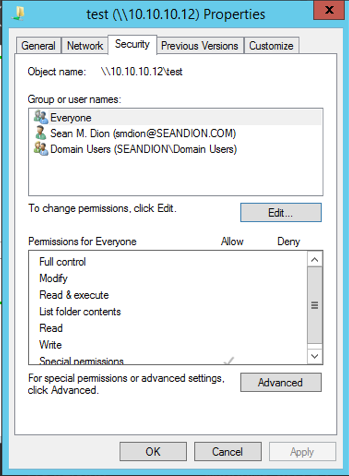
Now comes the part that had me confused for the longest time. I assumed you would be able to set permissions for users and groups directly in the unRAID WebGUI. You cannot. You need to set the permissions through a Windows machine that is logged in with your “initial owner” AD account that we set when unRAID joined the domain.
- Use file explorer to view all of your unRAID shares (IE \TOWER or \192.168.1.2)
- Right click on the first share and go to properties
- Press “Edit”, then Add. Add the RW and RO for the share you are editing and give “Full Control” to the RW account. By default the RO user should only have the rights for read only.
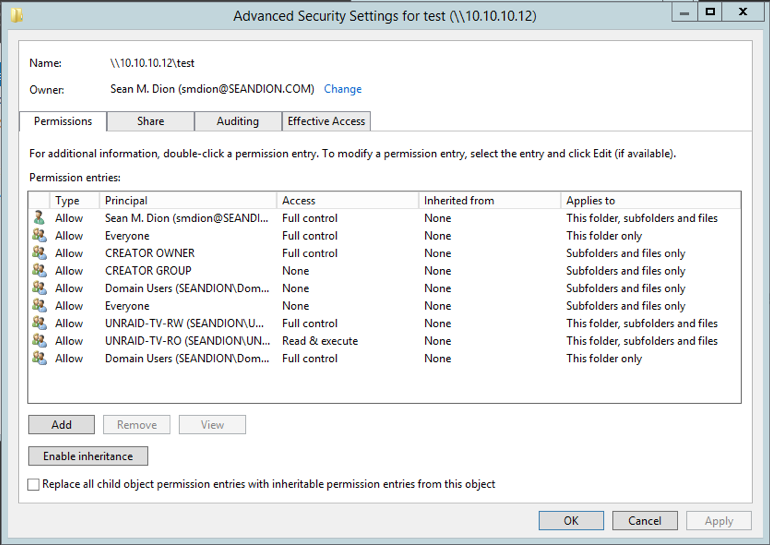
- Now we need to remove the default unRAID permissions and apply to all child items. Click “Advanced”
- Remove the “Everyone” and “Domain Users” that have “Full Control” and click the “Replace all child object permission entries” and press “Apply”.
- Repeat this process for every one of your shares, adding the correct groups.
- NOTE: If any of the permissions break and you lose access to your files you can run New Permissions from the Tools menu in the unRAID WebGUI to reset all permissions.
- Now you can remove/add users to each AD group for the permissions that you want.
As with any AD permission changes you may need to log-out/log-in as that user to get the updated permissions.
As ever, don’t forget our support forums if you need assistance with the contents of this post.
