
Users looking for personal backup solutions today have a plethora of options to choose from. Monthly subscription services like Crashplan, Carbonite, and Backblaze offer comprehensive personal and enterprise backup solutions. Users willing to put in a little extra elbow grease can make use of their own personal online storage, such as AWS S3, Google Drive, or OneDrive, paying for only the storage they need. Today's tutorial will focus on one such solution, utilizing Docker, Duplicati, and AWS S3.
Prerequisites
This tutorial assumes that you have the basic tools installed and some familiarity with them. We'll be using Docker and Docker Hub, both from the command line. We'll also be setting up an AWS S3 bucket and policy, as well as configuring an IAM user, so this will require an AWS account. Last but not least, of course, we'll be using Duplicati via its web interface, so you'll need a reasonably up to date browser.
Technical bits
- OS: Mac OSX Sierra 10.12.15
- Browser: Chrome Version 59.0.3071.109 (Official Build) (64-bit)
- Docker version: 17.03.1-ce-mac12 (17661)
- Docker image: linuxserver/duplicati latest
If you want to duplicate this setup using a different OS, visit https://docs.docker.com/engine/installation/#supported-platforms to see a current list of supported platforms for Docker CE, as well as the current stable release version. There should be minimal differences between running this on OSX and a given flavor of Linux. Windows users may have to utilize extra steps or commands.
Getting Started
Go ahead and open your terminal program(I use the excellent iTerm2 on OSX).
Run the following command:
$ docker pull linuxserver/duplicatiAfter a couple of minutes, the image pull should be complete. The final output should be:
Status: Downloaded newer image for linuxserver/duplicati:latestIf you want to verify that the image is now stored locally, you can run the docker images command, which should produce output like this:
$ docker images
REPOSITORY              TAG                 IMAGE ID            CREATED             SIZE
linuxserver/duplicati   latest              aee4aa038023        5 days ago          536 MB
...
...
Now that we've got the latest image downloaded, we'll need to actually build our container.
Creating The Container
Looking at the hub page for the docker image, you can view the various command line switches available when creating the Duplicati container. Be sure to take note of the configuration pattern used for the parameters. Each parameter is separated by a ":". The left side of the parameter represents the host system, in this case your laptop/workstation, or possibly server. The right side represents the container, which is our duplicati container in this case. Remembering this convention will make it easier to make sense of your run commands.
For the first pass, we're going to omit most of these, and only utilize the bare minimum needed to get up and running. Further into the tutorial, we'll configure a specific directory for our backup sources.
To build the container, we're going to tell the Docker software what we want to name the container, the source image, and the port mapping. I'll explain the specifics in a moment, but go ahead and run the following command to create the container:
$ docker create --name=duplicati -p 8200:8200 linuxserver/duplicatiIf the create command was successful, you'll be given the full container ID as output, which will look similar to this:
e66503d45ee8e9699db5a690879e717bb9e273e91486d4324ec92cf24e148a3cWhat we've done is create an actual docker container that can be launched. We named it: --name=duplicati, provided a port mapping: -p 8200:8200, and specified the source image: linuxserver/duplicati.
If you're unfamiliar with Docker, the port mapping might be confusing. What we are telling the Docker software is how to map ports between the host system, in this case your laptop/workstation, and the container itself. Without this port mapping, the container would still start, with Duplicati available on port 8200 on the container, but there would be no connection between an available port on your system and the container itself. The -p switch essentially "publishes" the port on the host system. In this case we're publishing the container port 8200 to the host port 8200. Read here: https://www.ctl.io/developers/blog/post/docker-networking-rules for a good primer on these settings.
Running Your Container
Let's go ahead and start the container using the following command:
$ docker start duplicatiYou should receive the name of the container as output, indicating that it has successfully started. You can verify that the container is running with the following command:
$ docker container lsBecause markdown formatting tends to compress wide terminal output, I'll break the output down into sections:
CONTAINER ID      IMAGE                   COMMAND
e66503d45ee8      linuxserver/duplicati   "/init"
The first part shows the short ID of the container, the source image, and the default binary/executable that is run on start up.
CREATED             STATUS
8 minutes ago       Up 2 seconds
The second part shows when the container was created, and it's status.
PORTS                    NAMES
0.0.0.0:8200->8200/tcp   duplicati
The final part shows the port mapping, in this case localhost 8200 to the container 8200, and finally the names that can be used to refer to the container.
Now that the container is up and running, and available on port 8200 on our host, we can access the Duplicati interface. Open up a new browser window/tab, and in the url bar enter http://localhost:8200
If it was successful, you should eventually end up at the following screen:
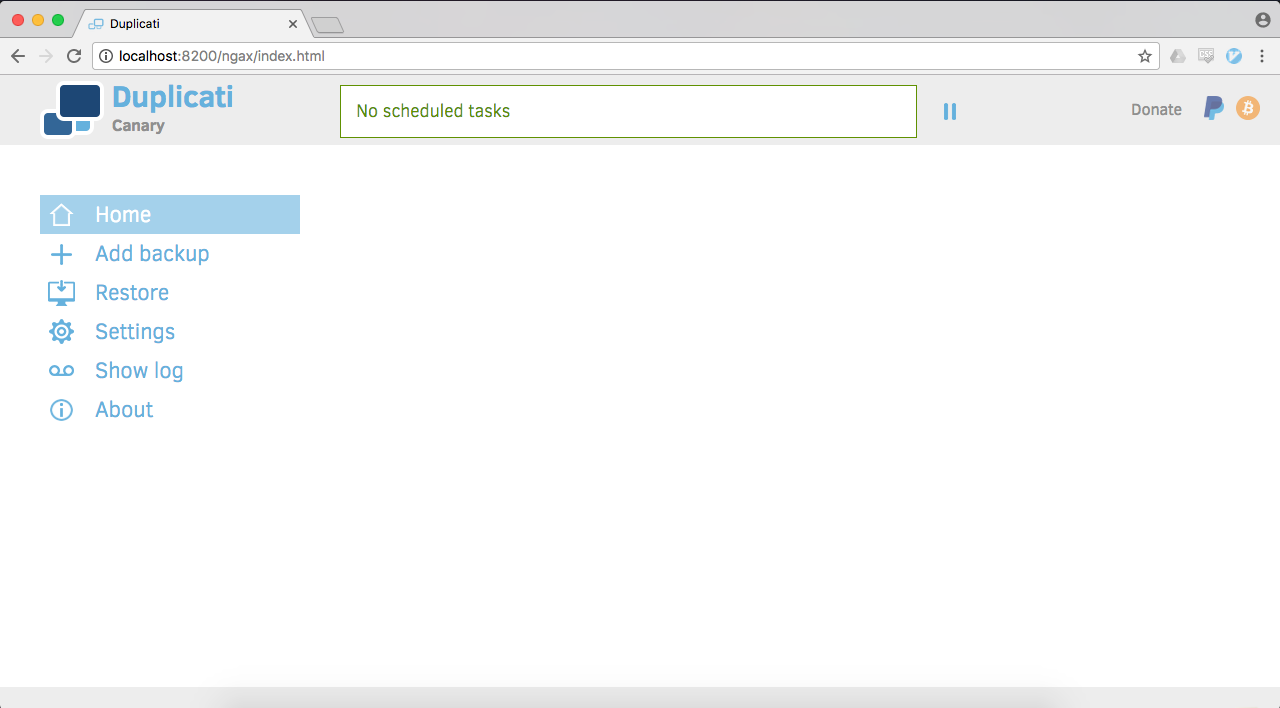
Congratulations! We've now got a Docker container running Duplicati. Feel free to play around in the interface, and check out some of Duplicati's features. In the next section, we'll configure Duplicati and AWS to get our backup job going.
Configure Duplicati for Backups
Before we can actually start setting up our backup job, there's a little bit of reconfiguration we need to do. Remember earlier when we created our container, we only used the bare minimum options to get up and running. If you explored the Duplicati interface, you may have noticed something:
With the current container configuration, Duplicati can only see and access the filesystem within the container itself. That's fine if the files you wanted to backup were already in the container, but that's not the case today.
We're going to create a newer version of our "duplicati" container, using an additional option described at the hub page.
What we'll need to do is "mount" the directory containing the files we want to backup to a directory inside the container. If you've ever mounted filesystems/directories in Linux, it's a somewhat similar principle.
There are a couple of ways to handle this. You can choose to mount only the specific directory to backup, or you can mount a higher level folder, such as your home directory, and choose specific directories from within the Duplicati UI. We'll be doing the latter, and I'll demonstrate with a dummy home directory.
I've created a "duplicati_home" directory, with sub directories as follows:
$ find -L duplicati_home
duplicati_home
duplicati_home/docs
duplicati_home/docs/resume.txt
duplicati_home/docs/shopping_list.txt
duplicati_home/docs/wish_list.txt
duplicati_home/pics
duplicati_home/pics/car.jpg
duplicati_home/pics/xmas.jpg
duplicati_home/tmp
If you choose to use your home directory, you can refer to it with ~/ if you're on OSX or Linux.
First, we need to stop the running container:
$ docker stop duplicatiThen we'll need to remove the current iteration of the duplicati container:
$ docker rm duplicati(You can also choose to retain the current container, simply choose a name other than "duplicati" for the new container.)
Let's go ahead and create the new container, and mount our directory to be backed up on the /source directory inside the container:
$ docker create --name=duplicati -v ~/duplicati_home:/source -p 8200:8200 linuxserver/duplicatiYou should receive a new container ID, indicating that the creation was successful. Now go ahead and start the new container:
$ docker start duplicatiAs before, open up a browser window, and enter http://localhost:8200 in the URL bar.
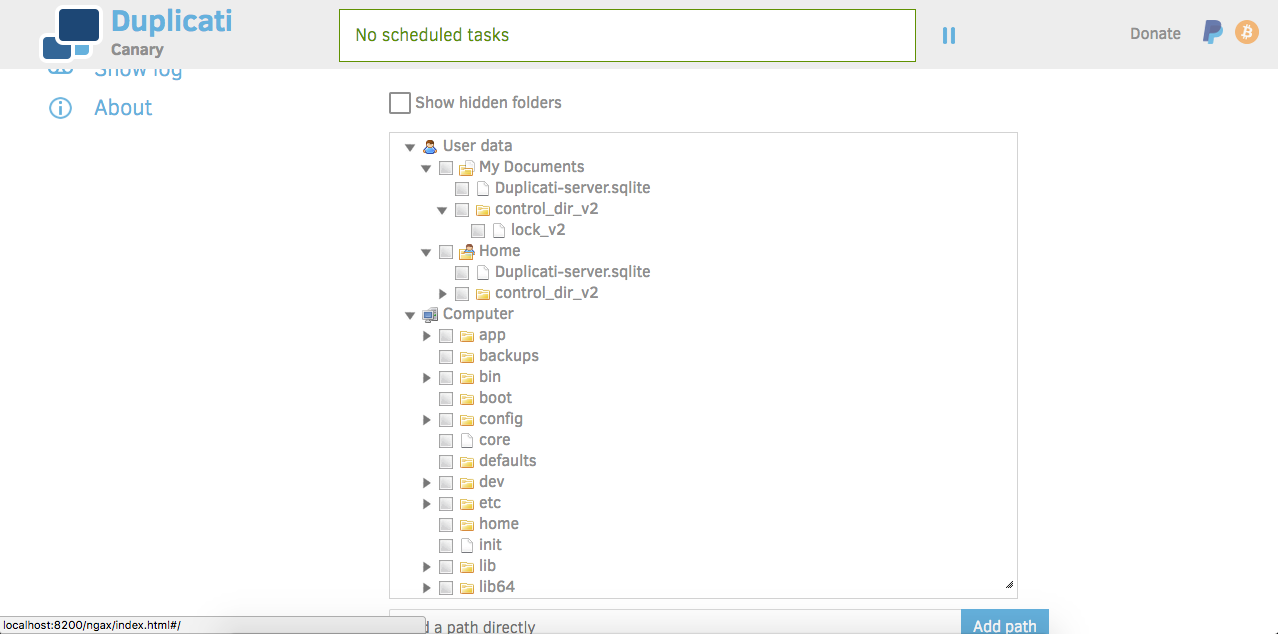
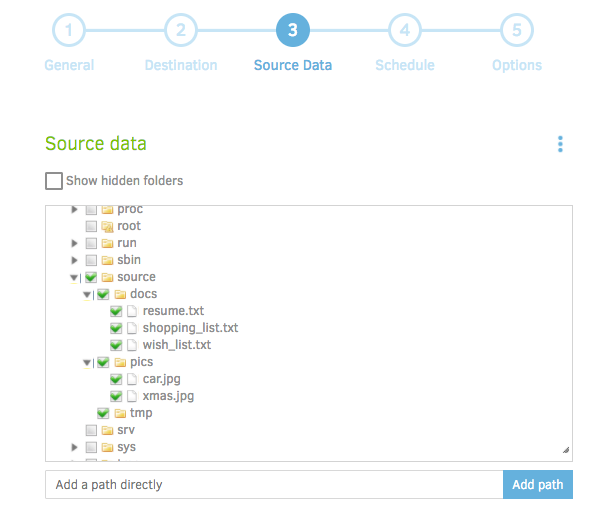
Once in the Duplicati interface, navigate to "Add Backup" in the left column, and click on step 3, "Source Data", at the top of the screen:
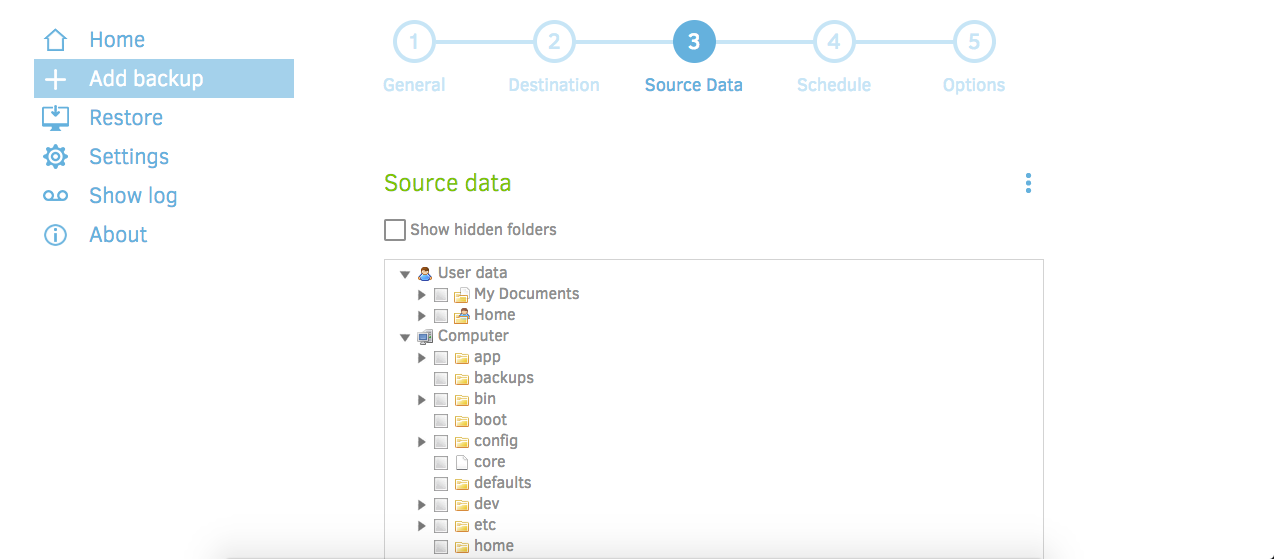
Scroll down the the list of files until you find the "source" folder. Click the black arrow next to it to expand the file tree:
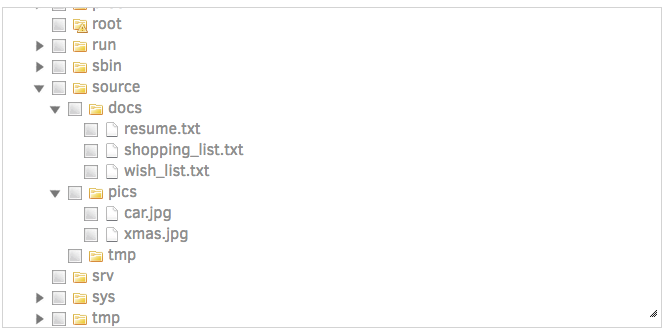
We can now see that our source directory is available as a mount inside the "source" directory inside the container. We're almost ready to create the first backup job. We need to shift gears a little bit, and do some prep work in AWS.
Configure AWS
WARNING: This next section involves provisioning AWS resources, which will incur some costs depending on the size of your backup. The costs should be relatively small, but you accept all responsibility for any charges billed to your AWS account.
It would definitely be possible to complete this section using nothing but the very powerful aws-cli, however in the interest of simplicity, we'll stick to the console. More advanced users can feel free to utilize it if they choose.
AWS Vocab
Let's take a moment to define a few simple terms that we'll be using in the next section. I highly suggest taking some time to read the AWS documentation https://aws.amazon.com/documentation/ for additional context and information.
- AWS Console: The GUI(Graphical User Interface) to the AWS service. Through the console you have the ability to provision, change, and destroy AWS resources.
- IAM: Identity and Access Management. An AWS service used to define access policies for AWS resources.
- S3: Simple Storage Service. AWS service that provides object based storage with a variety of options. The destination for our duplicati backups.
- IAM User: IAM entity that represents a user. For the purpose of this tutorial, it will represent you as an actual user, and a separate user will represent the Duplicati backup service.
- IAM Policy: An access policy object, written in JSON, that defines the rules allowing access to specific AWS resources. You can attach up to 10 of them to an IAM user to define what resources they can access.
- S3 Bucket: The root level storage object of S3. They require a globally unique name, and can host a nested folder structure that is not required to be unique. Think of it as a folder in a filesystem.
- S3 Bucket Policy: An access policy object, written in JSON, that defines access rules to an S3 bucket. Take note that this is separate from an IAM policy, and in combination forms the total access policy for an S3 bucket.
Get Started
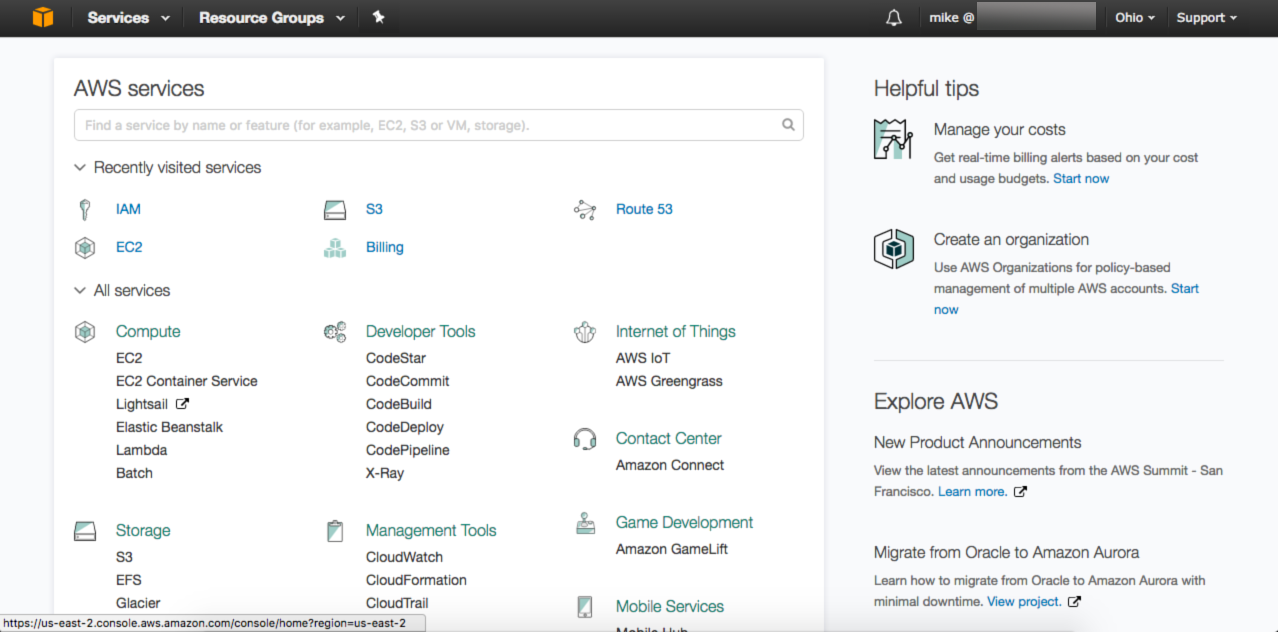
Go ahead and log into the AWS console. If you're logging into the console with the root user, I'd strongly advise setting up a separate IAM user with 2FA authentication, detailed here. You'll need an IAM user set up to be able to complete the second part of this section anyways, and it's just good security practice overall.
Your screen should look similar to this:
Note that I did not specify a region. This tutorial will work in any region that has S3 and IAM available, which is almost all of them as of the writing of this article. I'm currently operating out of us-east-2. I recommend you choose the geographically closest region for best latency.
Create an S3 Bucket for Backups
We'll go ahead and get started with creating a bucket to use for storage of our backups. Under 'Storage', click 'S3'.
You should be at this screen. It may look slightly different if you already have existing buckets in use:
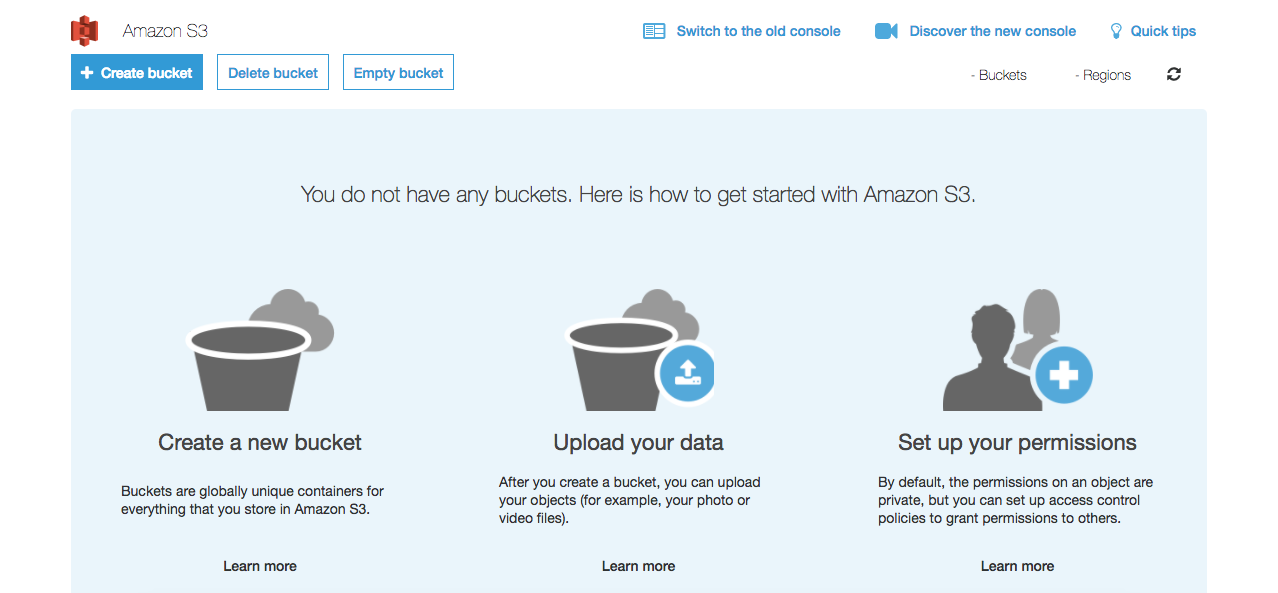
A unique quirk of S3 buckets that you need to be aware of before you choose a name: because they are also routable DNS names, bucket names must be globally unique across all existing bucket names in S3.
We can get started by clicking the blue '+ Create bucket' button at the upper left of the interface:
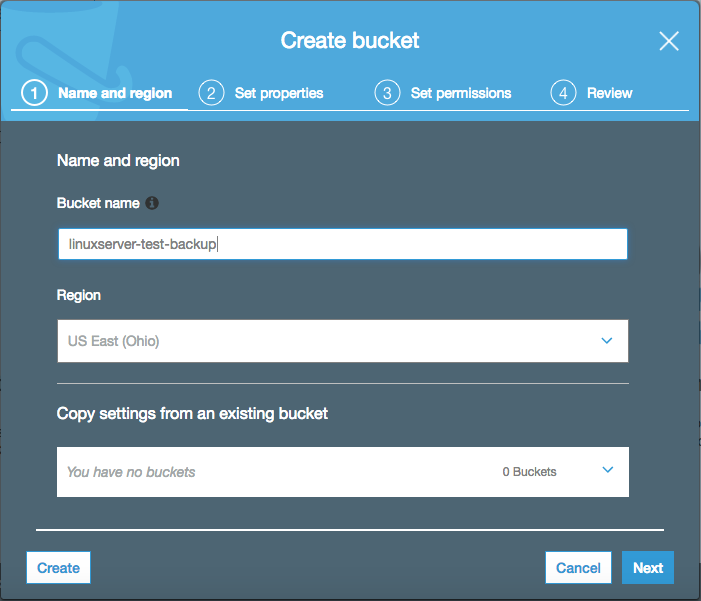
I've named the bucket 'linuxserver-test-backup', which was globally unique and not taken until this moment. I'm using the Ohio(us-east-2) region, and I do not have an existing bucket to copy settings from.
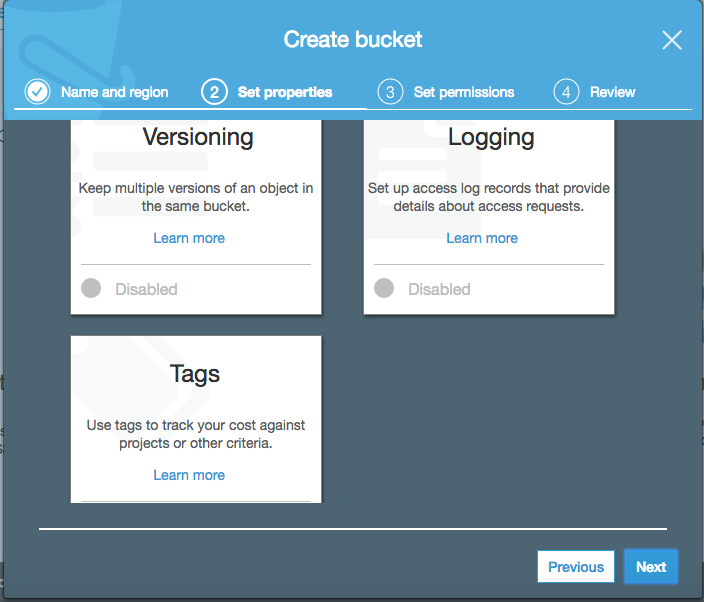
Here you can specify bucket properties and features. Tags and Logging are features that are more useful in larger organizations, where 100s or 1000s of AWS resources may be active at any given time. You may want to consider enabling versioning if want to keep versioned copies of your backups as an additional safety measure. Two things to be aware of: this will incur additional storage costs, and once versioning is enabled on a bucket, it can never be disabled, only suspended.
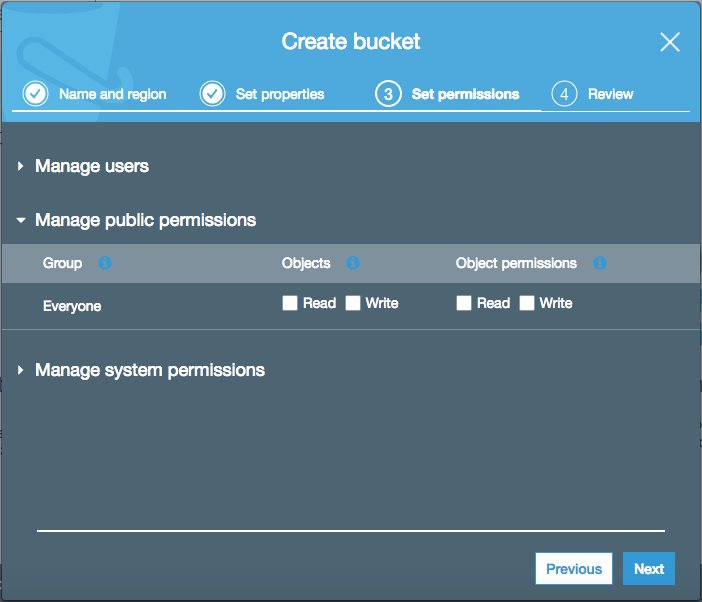
S3 sets the permissions appropriately for this kind configuration "out of the box", however I want to draw attention to a specific setting that has and continues to burn people. Notice in the above screenshot that under "Manage public permissions", the "Everyone" group has no Read/Write permissions for Objects or Object Permissions.
Let me state this loud and clear: IF YOU ENABLE THESE OPTIONS, ANONYMOUS, UNAUTHENTICATED USERS ON THE INTERNET WILL HAVE ACCESS TO THE CONTENTS OF YOUR BUCKET!!!!
Time and time again I see individuals, some with very robust technical backgrounds, leave public permissions enabled on S3 buckets, with very bad results. Please do not do this.
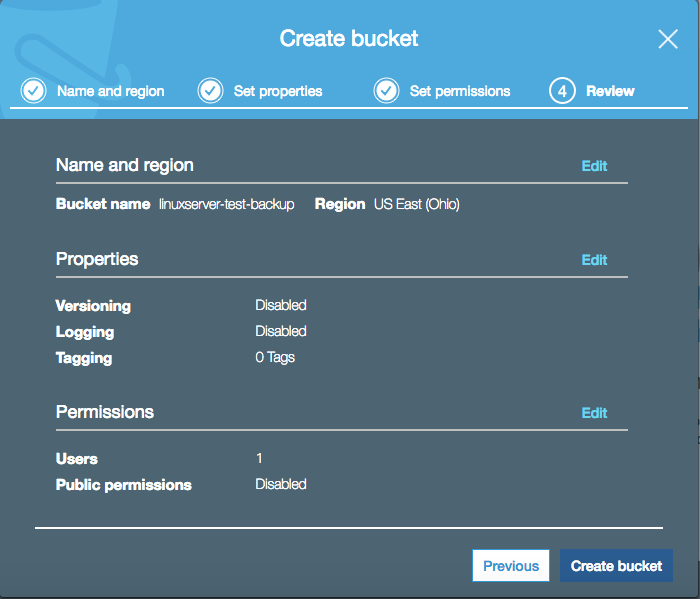
You have a chance to review the settings before creating the bucket. If all looks good, click "Create bucket" in the lower left.
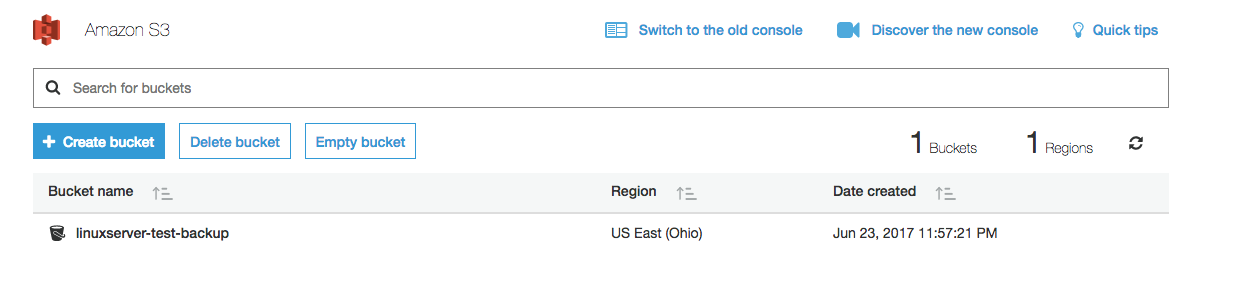
If everything was successful, we should now see our new bucket available in the console. Next, we're going to head to the IAM console to set up an IAM user.
Set Up Your IAM User
Ideally, you've got an IAM user already set up that you logged in with, and you have stored a local copy of an active Access/Secret key pair for that user. Duplicati will need these to communicate with the S3 service. If you already have this, you can skip ahead.
If you don't have these things, a little extra work is required.
First, if you're still logging in with the root account, follow the steps shown here: http://docs.aws.amazon.com/IAM/latest/UserGuide/getting-started_create-admin-group.html
Once you've completed the above, or if you have an IAM user without access keys, follow the steps here: http://docs.aws.amazon.com/IAM/latest/UserGuide/id_credentials_access-keys.html#Using_CreateAccessKey. Look under the section "Creating, Modifying, and Viewing Access Keys (AWS Management Console)"
Be sure to store the keys in a safe place, and set very restrictive permissions on the file, so that only your user can view them.
With our S3 bucket and IAM user keys, we can head back to Duplicati to continue configuring our backup job.
Configure Your Backup
Open up the Duplicati interface again. If you closed the tab, it should still be available at http://localhost:8200.
Once at the home screen, go ahead and click "Add Backup" in the left-hand column:
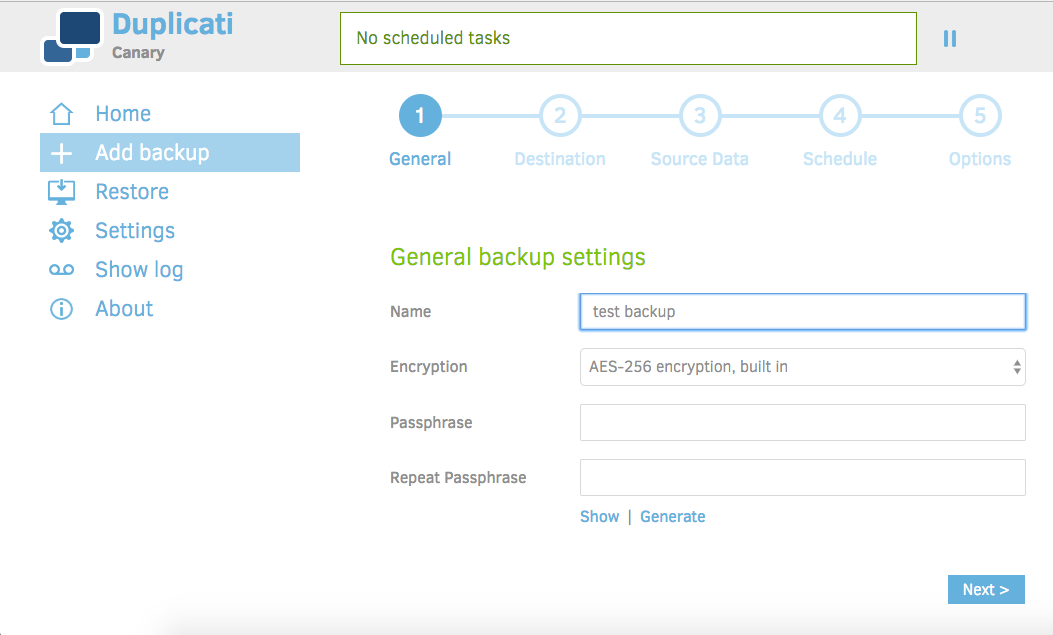
Choose a name for your backup. I've chosen "test backup" as mine, feel free to choose something more meaningful.
Duplicati has three options for encryption: none, AES-256(built-in), and GnuPG(external). For this tutorial and in the interest of simplicity, we're going to choose the AES-256 built-in option. Some users may prefer to use GnuPG, but that requires external keys and is beyond the scope of this tutorial. You also have the option to choose no encryption, but in the interest of security I strongly suggest otherwise.
Since we'll be using encryption, Duplicati requires a passphrase. You can provide one, or Duplicati will generate one for you. If you decide to provide one, Duplicati will warn you if the password is too weak.
WARNING: Save this password in a safe place. If you lose this password, you will not be able to decrypt your backups, and will lose access to the files!!! I use the excellent KeePassXC for storing passwords securely.
After entering the passphrase twice, click next to move on to step two:

Set your configuration to match what is displayed above, with the exception of bucket name and AWS Access ID/Access Key. Enter the name of the bucket you created earlier, and enter the AWS credentials that you downloaded previously. If you don't have credentials for your IAM user yet, or you lost them, follow the steps here: http://docs.aws.amazon.com/IAM/latest/UserGuide/id_credentials_access-keys.html#Using_CreateAccessKey.
Duplicati provides the option of generating an IAM access policy, but that won't be needed for this tutorial. Go ahead and click 'Test connection', Duplicati will run through some steps to test connection to your AWS account and S3 bucket, and will ask for some input:
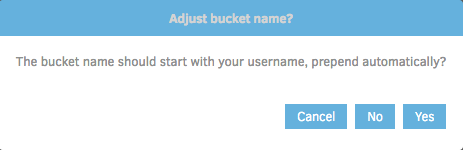
Duplicati seems to think that the bucket name should start with the username. You can choose this if you want to help ensure the bucket is unique, but for the sake of this tutorial click 'No'.
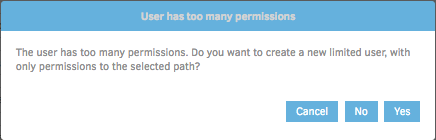
Uh oh! No big deal though. This is actually a very cool feature that I commend the Duplicati developers for implementing.
What this warning is saying is that the user for whom we provided credentials earlier has permissions that are much too broad for the scope of what Duplicati needs to perform backup jobs.
If you followed the AWS documentation provided earlier, you likely created an IAM user with admin-level permissions to AWS. This means that the user can create, destroy, and modify just about any AWS resource possible. That makes sense for an administrative user, but is far too broad for a backup application. You should always aim to implement Principle of Least Privilege, so that if, for instance, the AWS credentials of that user were compromised, the compromising entity would only have access to a subset of S3 resources, rather than the entirety of your AWS account.
Go ahead and click 'Yes' to create the new limited user:
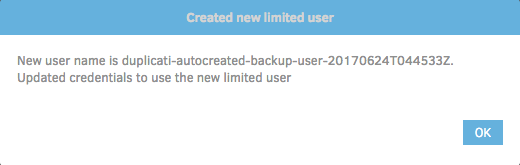
You'll be shown a similar screen indicating that a new user was created. The exact name will likely be different. Go ahead and click 'OK':
Awesome! Now we've got an IAM user that Duplicati can utilize to perform backup jobs, with an appropriately restricted level of access. Go ahead and click 'Next' at the lower right-hand side of the UI.
Step 3 is where we'll choose our source data. Remember from earlier that the folder on the host machine we want to backup is mounted on the 'source' folder within the container. Choose which files/folders to backup. Duplicati provides some additional options for filtering files based on regex, or excluding files based on type or size:
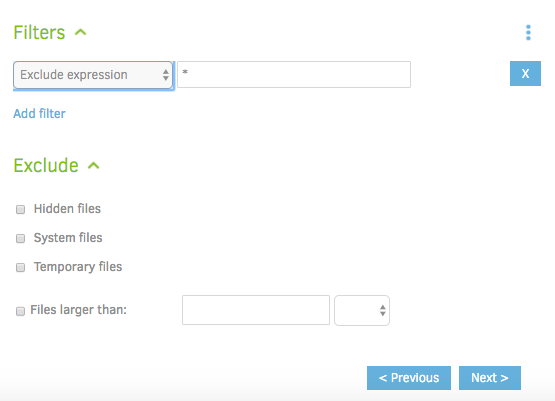
For instance, you might want to omit temporary/system files, only backup files starting with the letter "E", or omit files bigger than 100mb. We won't be using these options for the tutorial, but feel free to enable them as needed. Go ahead and click 'Next'.
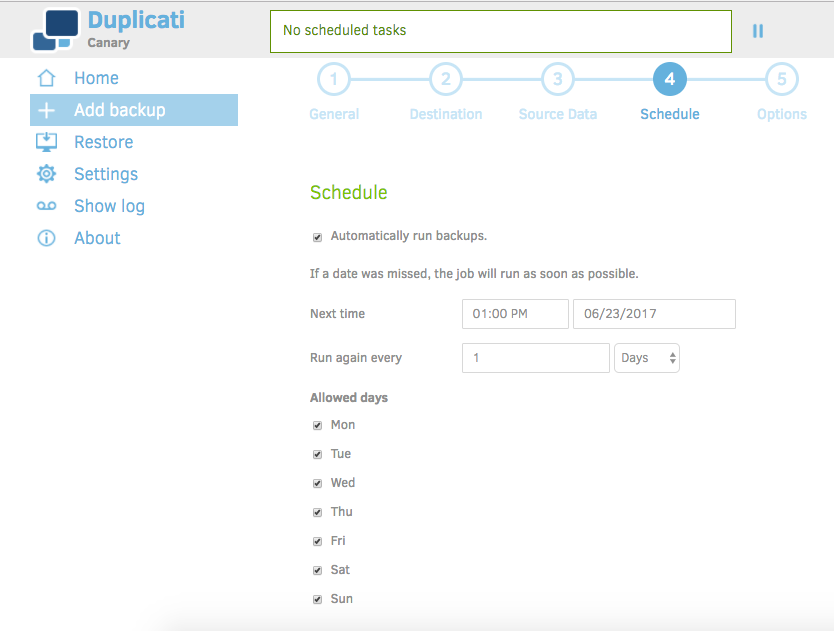
This step is where we'll set our backup schedule. We don't want to have to think about them, so let's automatically run the backups. Choose what time, interval(daily, weekly, monthly etc...), and allowed days that make the most sense. For a folder I'm working out of regularly, I'd say daily is probably a good interval. You may want to choose other options depending what's being backed up, household bandwidth availability, or other concerns.
Let's proceed, we're almost done. Click 'Next'.
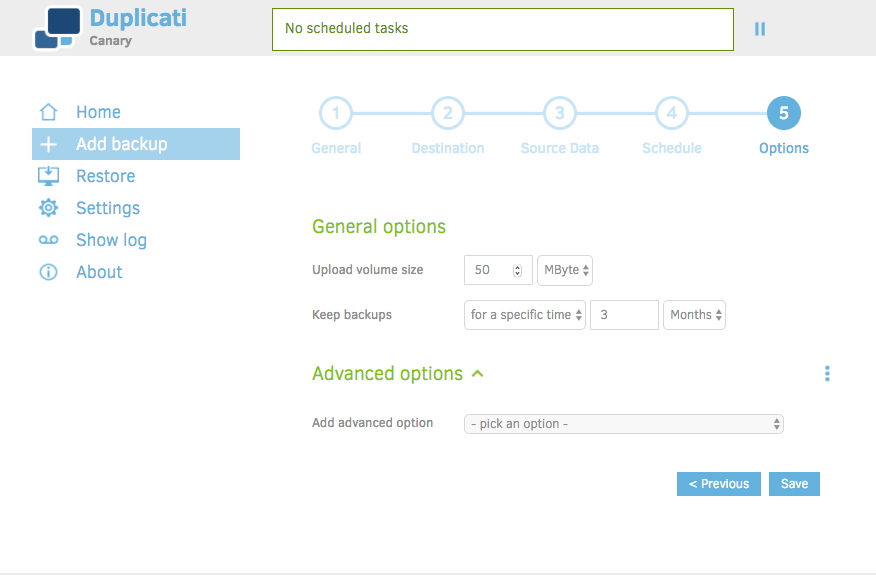
Here we're given a final set of options to choose, which includes the 'Upload volume size' and length of time to keep the backups.
Rather than waste words re-explaining the 'Upload volume size' feature, I'll point you to the Duplicati documentation on the subject: https://www.duplicati.com/articles/Choosing-Sizes/. Suffice to say, for the purpose of the tutorial, you can leave it at 50mb.
Length of time to keep backups is a matter of personal choice, and dependent on the nature of what you're keeping. Choose something that seems reasonable, and will provide you enough historical access to your data should you need it.
You will have probably noticed the option to enable certain 'Advanced Options' at the bottom of most config screens. There are some interesting/powerful options in there, but I've purposely not addressed them, as I feel they are beyond the scope of the tutorial. Once you're comfortable with Duplicati and want to dive deeper in to tuning it to your liking, I'd definitely suggest taking a look.
Congratulations! We've configured a backup job. Click 'Save' to create it:
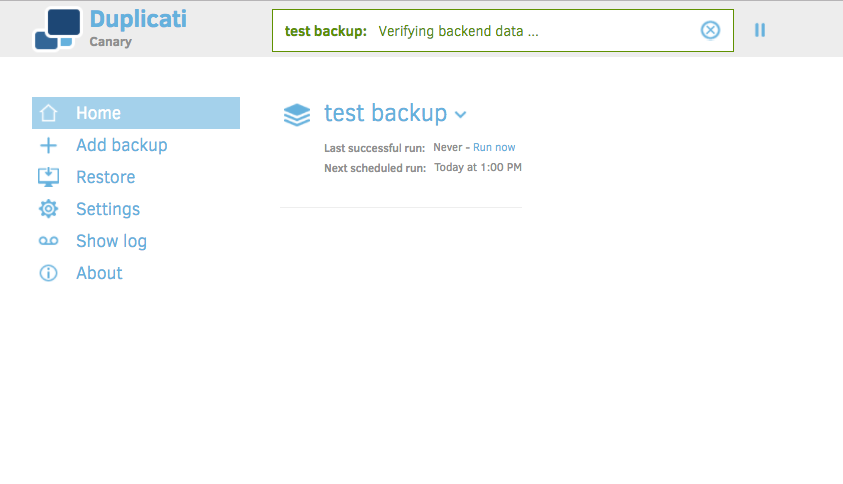
Notice we're back at the home screen, except now we've got a backup job available. Depending on when the backup was scheduled, it may be awhile before it runs. Let's go ahead and click 'Run now' to verify it.
Duplicati will take some time to start the job, and verify your backend storage(in this case S3). Unfortunately, you're probably going to be greeted by this:

What gives? Let's take a look. Click 'Show' to view the logs:

Your log should be very similar. The first few lines provide a clue as to what's going on:
Amazon.S3.AmazonS3Exception: Access Denied ---> Amazon.Runtime.Internal.HttpErrorResponseException: The remote server returned an error: (403) Forbidden. ---> System.Net.WebException: The remote server returned an error: (403) Forbidden.S3 is returning a 403 error to Duplicati when it attempts to initiate the backup. Now, I'm sure you're thinking to yourself "but didn't we create a special user with the exact permissions needed?" We did. It took me some reading to figure out what was going on, but it turns out to be a quirk of IAM/S3 permissions and policies. We'll make a quick detour back to the AWS console to fix the problem, and then we should be good to go.
Fixing S3 Permissions.
For some background, I'll direct you read this: https://aws.amazon.com/blogs/security/iam-policies-and-bucket-policies-and-acls-oh-my-controlling-access-to-s3-resources/.
It's an older article, but it emphasizes an important point: IAM Policies and S3 Bucket Access Policies are separate entities, which combine to form an access policy in which Deny is default.
What does this mean in the context of what we're trying to accomplish? From the IAM perspective, our duplicati-autocreated-backup user has all the necessary IAM policy grants to be able to function. You can verify this by visiting the AWS console, going to the IAM Management Console, and clicking 'Users' in the left hand column:
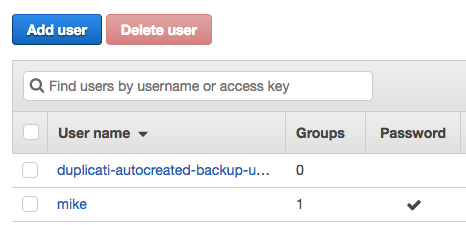
You should see whatever IAM users you've created, as well as the user that Duplicati created. Go ahead and click on it.
On the 'Summary' screen, look at the 'Permissions' tab. You should see a right facing arrow next to the 'duplicati-autocreated-policy':
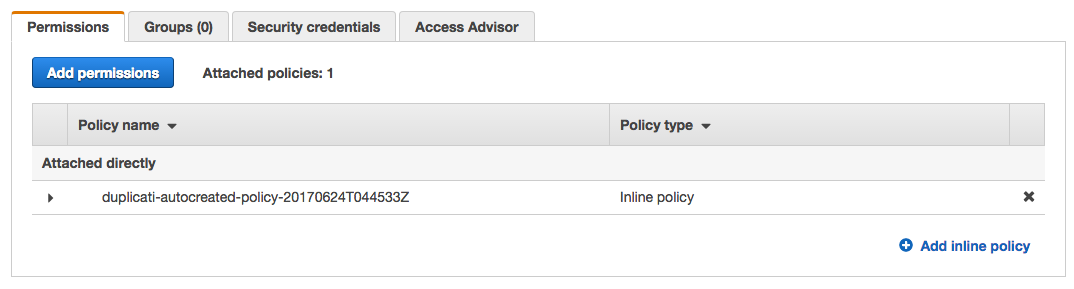
Click the arrow:
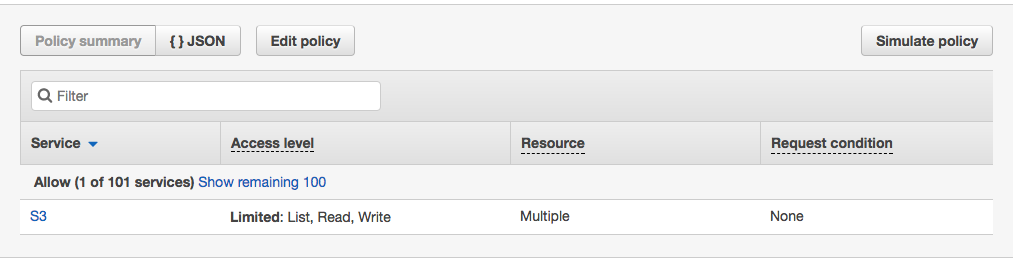
Click the blue 'S3' link, and then on the next screen, click any of the blue links for the various actions. I chose 'GetObject':
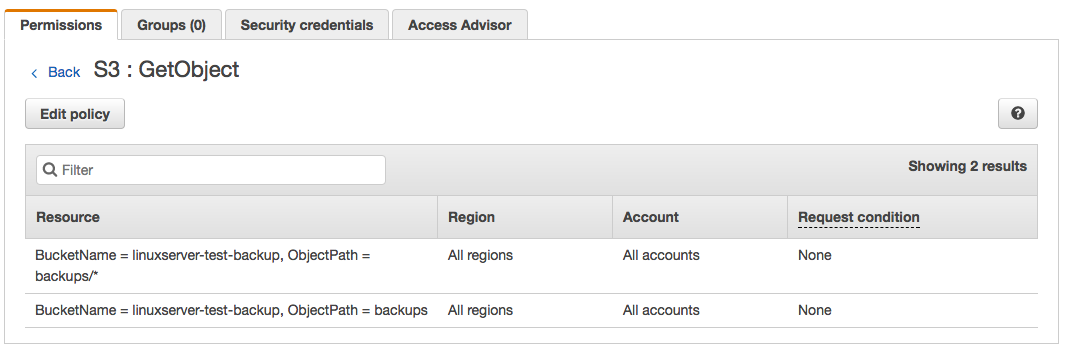
As you can see, our IAM user has the correct policy grants to be able to take actions in the S3 bucket.
So what's going on? The behavior that we're experiencing indicates that the final policy object that's created is resulting in a DENY.
From the referenced AWS article on policies:
"...Only if no method specifies a DENY and one or more methods specify an ALLOW will the request be allowed."
Except what we're seeing seems to contradict that.
As it turns out, we'll need to set an explicit ALLOW via S3 bucket policy as well as IAM policy. It appears that the absence of an ALLOW in S3 is preventing access.
Before we fix the issue, we'll need one more piece of information from the IAM User Summary. We're going to need the User ARN of the autocreated user from Duplicati. User ARNs are formatted as such:
arn:aws:iam::<your_aws_account_id>/<your_iam_user>
Copy it down, we'll need it in a moment.
Go ahead and navigate to the S3 Management Console, and click on the bucket we created to store our backups. Click on the 'Permissions' tab:
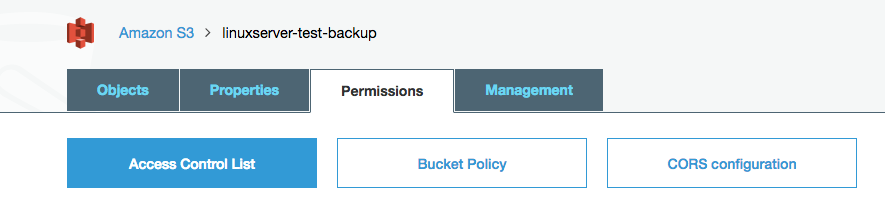
Click on 'Bucket Policy':
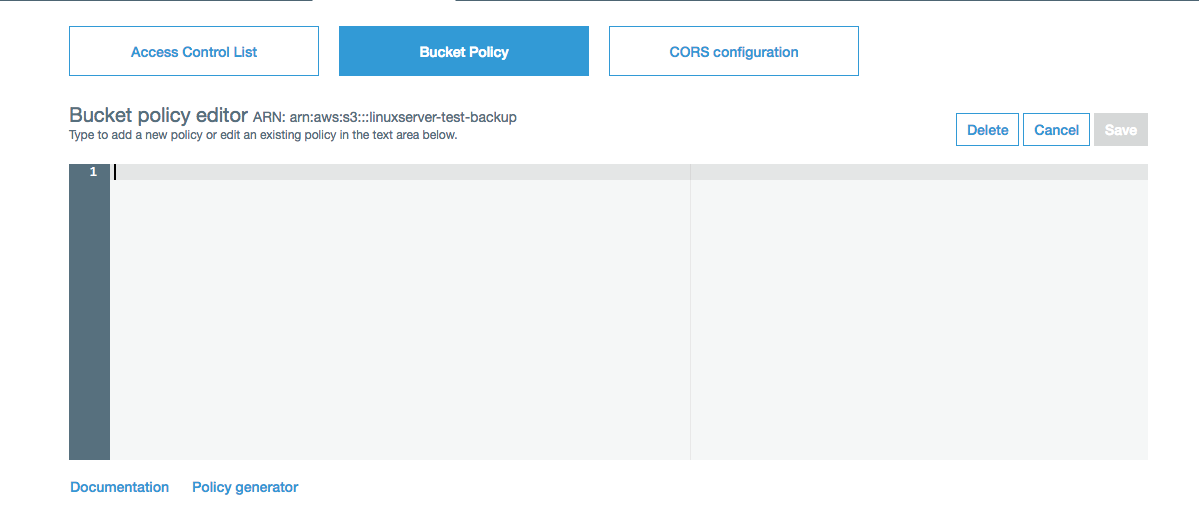
You should see an empty policy, which is what I believe is causing a default to a DENY policy.
Like IAM policies, S3 bucket policies are written in JSON. There are some key differences though, like setting a principal. AWS provides comprehensive documentation if you'd like to learn more about them. For the purpose of this tutorial, I've gone ahead and created a policy template that will correct the error. All that is needed is to substitute your user ARN that you copied earlier, and the name of your bucket that you created earlier in the tutorial:
{
    "Version": "2012-10-17",
    "Statement": [
        {
            "Effect": "Allow",
            "Principal": {
                "AWS": "<exact_backup_user_ARN_from_console>"
            },
            "Action": "s3:*",
            "Resource": [
                "arn:aws:s3:::<exact-name-of-bucket>",
                "arn:aws:s3:::<exact-name-of-bucket>/*"
            ]
        }
    ]
}
Be sure to omit the enclosing '<>' for the ARN and bucket name. Click 'Save' on the upper right. It will take a moment to validate that the policy is both syntactically and policy valid. If you receive an error that it is not valid, double check that you copied the above example exactly, and pasted the relevant data in the correct places, omitting the <> and retaining the "".
The policy should take effect immediately, so let's head back to Duplicati and see if our backup works now.
Running Your Backup Job
Open the Duplicati home screen again. Click 'Run now' on your backup job.
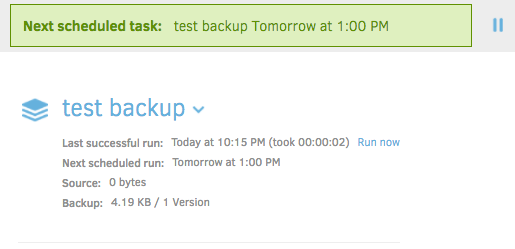
Depending on the size of your backup job, it may take some time for it to complete. Assuming that it was successful, you'll be presented with a green bar at the top, as well as an updated value for 'Last successful run'.
Congratulations! Now we've got an automated, personal backup service running in Docker!
Conclusion/Final Thoughts
Hopefully this tutorial has been helpful. If it's your first experience with Docker, I encourage you to take some time to learn and explore further. It's a powerful and exciting technology that only figures to grow in usage and application as time goes on.
Obviously, we only touched on the basic features of Duplicati to get a working backup job. There are a wealth of settings and backup destinations we didn't explore. There are also many neat tricks and hacks that could be explored(like only spinning up a container on a schedule, or when files are changed).
If you'd like to see the tutorial expanded, or have questions/comments/concerns/criticism, please provide feedback. Thank you for reading, and enjoy your new backup service!