For me a network boot server is a core infrastructure tool on my home network allowing me to:
- Boot computers into recovery environments when something goes wrong
- Boot current Linux installers/Live CDs for wipes and fresh installs
- Run diskless nodes that perform specific worker functions
Until recently I had always manually maintained a custom set of boot files on a small TFTP server and kept them up to date with the boot options I found useful.
When I discovered the netboot.xyz project I immediately saw the value in centrally maintaining a current rolling list of internet enabled boot options. We have been working for months to bring you an LSIO image that allows full self hosting of these boot options.
Do you want to stop downloading and loading current Linux Distros to USB sticks and CDs ? This image might just be exactly what you are looking for and it will always have the latest options available with a constantly growing list:
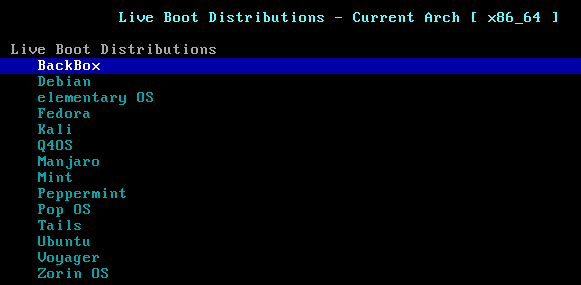 Goodbye text console installers and hello modern Linux Desktop Environments.
It is important to note that HTTP/HTTPS Live CD booting is in constant development and might have slight bugs noted in the boot menus. For example if you use a web booted Live CD to install your system to disk for Debian based distros you will want to re-enable your Ethernet adapter after first boot by modifying /etc/NetworkManager/NetworkManager.conf
Using the Image
This image is unique in our collection, as to be fully functional you need to have a network device capable of setting PXE boot next-server options. We keep maintained documentation on setting those boot options here. (if you still want to try netboot.xyz without a local server they have all kinds of boot options available here including CD/USB)
Essentially what happens here is:
- Your computer boots off it's network device (set in bios or selected as an option from boot menu F10 or F12 conventionally)
- The computer asks your local DHCP server for an IP and what it should boot off of
- Once networking is configured your Computer looks for the file specified in the previous request which is hosted on a TFTP server in this container
- Your computer boots the IPXE boot file as a kernel and it now presents the full netboot.xyz menu hosted off the same TFTP server in the form of IPXE files
The image itself is run like any other images we host out of Dockerhub: (there is also a template for Unraid users in our repository)
docker create \
  --name=netbootxyz \
  -e PUID=1000 \
  -e PGID=1000 \
  -e MENU_VERSION=1.9.9 `#optional` \
  -p 3000:3000 \
  -p 69:69/udp \
  -p 8080:80 `#optional` \
  -v /path/to/config:/config \
  -v /path/to/assets:/assets `#optional` \
  --restart unless-stopped \
  linuxserver/netbootxyz
This image hosts 3 core services:
- TFTP server for serving IPXE boot files and menus (port 69 udp)
- NGINX server for hosting custom netboot.xyz assets locally (port 8080)
- netboot.xyz web application for customizing local menus and pulling in remote assets (port 3000)
Just like the vast majority of our Library this image is compatible with all major Arm platforms out there with arm32v7 and arm64v8 images available.
Customizing Boot Menus
One of the core functions of the Web interface is to allow you to edit the IPXE files, under the Menus tab in the application you can create new IPXE files or choose one to edit:
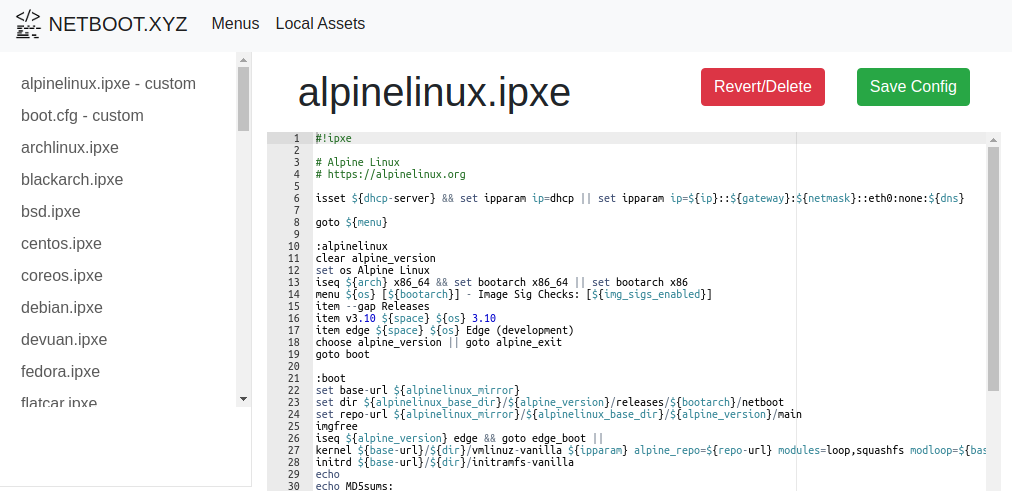 It is important to note when you save a file here or create a new one you will always be able to revert to the stock IPXE file so do not be afraid to experiment.
For information on creating/editing IPXE files and the basic layout see the Boot Menu Basics section below.
Hosting netboot.xyz Assets Locally
Hosting the assets from NGINX is optional , but most Live CDs are multiple Gigabytes and if you don't want to download them from the internet every time you boot them you might want to hop in and download the ones you need along with pointing the menus to your local server.
Under the Local Assets tab you can pull in assets from the current release of the netboot.xyz menus and boot files.
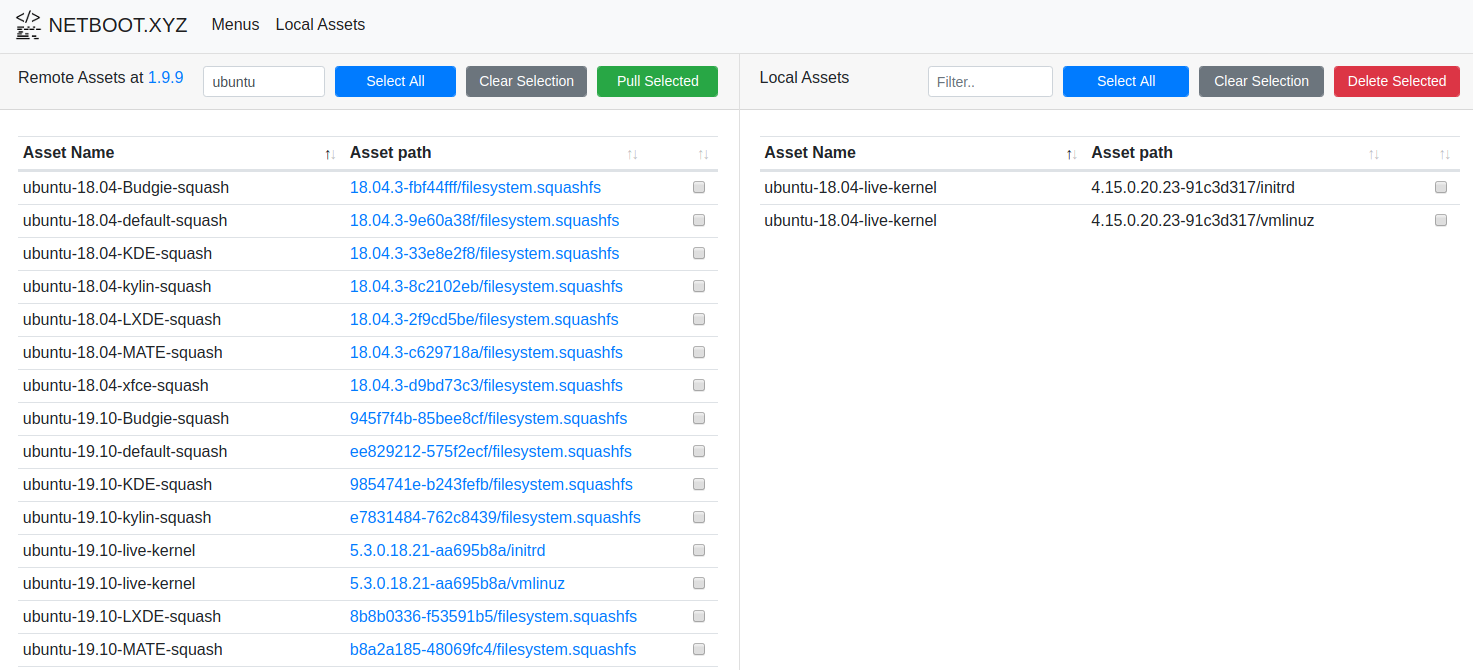 This downloads files to your NGINX endpoint (by default running on port 8080) with an identical directory structure to the netboot.xyz github assets. This allows you to swap out a
 live_endpoint setting either universally in the boot.cfg or per file where needed by adding the stanza: (swap with the IP of your server)
set live_endpoint http://192.168.10.13:8080This live_endpoint setting is crucial if you want to have computers on your network ingest assets from your local webserver instead of Github, for example a stock boot option for Ubuntu Budgie 19.10 to see where this setting is used:
:ubuntu-19.10-Budgie-squash
set squash_url ${live_endpoint}/ubuntu-squash/releases/download/945f7f4b-85bee8cf/filesystem.squashfs
set kernel_url ${live_endpoint}/ubuntu-core-19.10/releases/download/5.3.0.18.21-aa695b8a/
goto 19.10-boot
:19.10-boot
imgfree
kernel ${kernel_url}vmlinuz ip=dhcp boot=casper netboot=url url=${squash_url} initrd=initrd
initrd ${kernel_url}initrd
boot
If you plan on hosting all of the assets locally simply change the setting in the boot.cfg file but for example you only want to download the Ubuntu assets place that line at the top of the file live-ubuntu.ipxe under the #!ipxe header line.
In the next section we will be going over the basics of writing IPXE scripts and customizing the boot menu.
Boot Menu Basics
Hello world!
IPXE might be scripting language but at it's core it writes just like all other boot configs from Grub to Syslinux. The most basic Linux boot file would boot a Kernel and initramfs conventionally containing a pre-boot environment but in our example below it is the whole install system:
#!ipxe
set url http://archive.ubuntu.com/ubuntu/dists/bionic/main/installer-amd64/current/images/netboot/ubuntu-installer/amd64/
kernel ${url}linux
initrd ${url}initrd.gz
boot
This boot snippet will load the Network installer for Ubuntu 18.04. You will notice a few things about this, the first is we have the ability to set variables using set and the next being we are using a remote webserver to ingest these files. This is what gives the IPXE bootloader the ability to consume all of this stuff from the internet vs being locally hosted on a tftp server. It also includes a ca certificate chain so it can pull from modern https endpoints like Github.
On top of this basic example you can use logic operators like iseq (is equal) or isset (is set) to control the flow of the menus on top of the users options being captured with choose menus. There are great resources and documentation on the IPXE website for this language:
Though you will likely find the best examples in you locally hosted netboot.xyz boot menu files. To find out what you would do with a simple boot snippet file like this skip down to the Custom booting specific machines below.
boot.cfg your go to file
The netboot.xyz project as a whole has made every effort to make all the settings a normal user self hosting would need to modify be loaded from the boot.cfg file. This file has 3 sections a normal user would modify:
- Core Global Vars- This includes the important
live_endpointfor self hosted assets along with common settings to name your site etc. - Mirrors- If you host local Linux mirrors in your environment you will want to swap them out in this section to speed up Linux Network installs.
- Enable Menu Options- If you do not want to maintain customized IPXE files
Custom booting specific machines
If you have a specific machine on your network (diskless or not) that you want to persistently boot a specific boot file you can achieve this by adding an IPXE file named after the machines MAC address or Hostname in the following format:
- Computers MAC is 02:42:7b:02:ba:59 -
MAC-02427b02ba59.ipxe - Computers Hostname is bootserver -
HOSTNAME-bootserver.ipxe
Note, that to use the Hostname variable you will need to have a static DHCP lease setup in your router with the hostname variable set. Conventionally we recommend using the MAC address syntax.
This can be especially useful for a truly diskless desktop like described in Ubuntu's Old but still relevant guide . (you can skip everything regarding tftp and DHCP/dnsmasq setup) Arch also has good documentation on the subject . In essence you host your kernel/initramfs on an http endpoint using this image and during pre-init your root device is mounted from an NFS server.
Or if you want to image a machine unattended using something like Clonezilla they have basic boot snippets for tftp endpoints and how to run custom scripts.
Appendix
netboot.xyz Special sauce
Network booting Operating systems even off the Internet is not a new concept. Boot snippets to load Linux installers from their own mirrors are provided for many major distributions and it is hard (usually unthanked) constant maintenance to keep all of those boot options up to date with external releases and changes.
One set of functionality that no one has provided before netboot.xyz is to lift network booting out of text consoles and up to the most modern Linux Live CDs. This is achieved through an effort to customize Live CD assets to be compatible with HTTPS endpoints and to host and maintain that list of assets: [
netbootxyz/build-pipelines
Contains the centralized logic for assembling custom assets for consumption from Github - netbootxyz/build-pipelines
netbootxyzGitHub

Network Boot Unraid VMs (KVM)
Unraid has a very nice gui that allows managing kvm qemu VMs. With one manual modification (adding boot order to the network interface), the VMs on Unraid can be made to network boot.
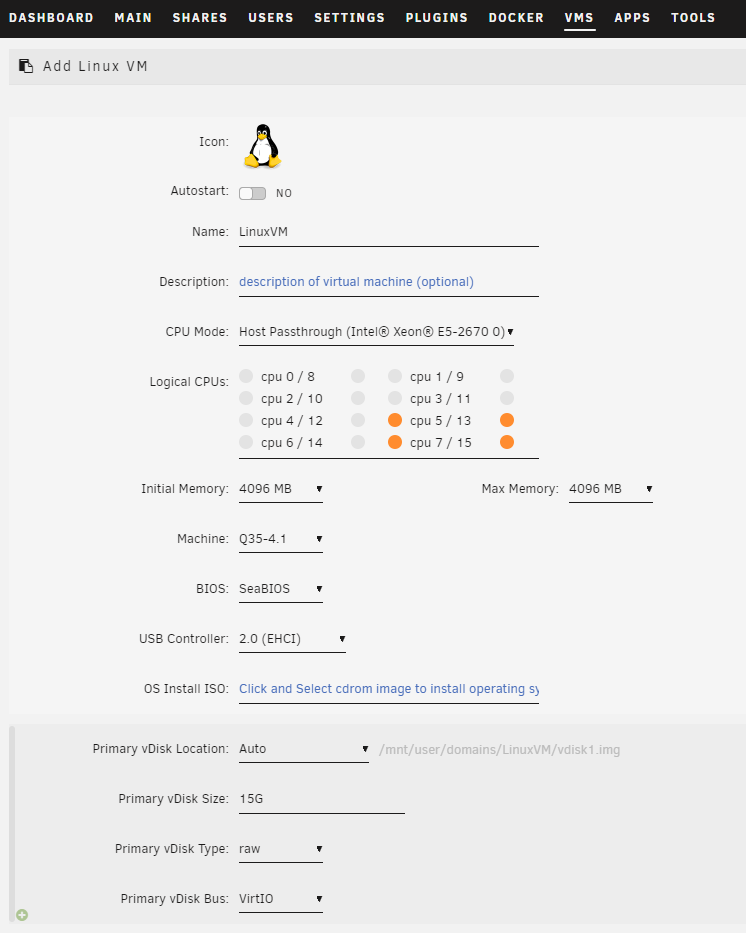
First, let's create a new VM named LinuxVM with 4GB of ram, Q35-4.1 as the machine type and most importantly, utilizing SeaBIOS instead of OVMF (netbootxyz recommends using legacy bios for best results). For the hard drive, we'll let unraid create a 15G raw disk utilizing VirtIO (you can select your own size).
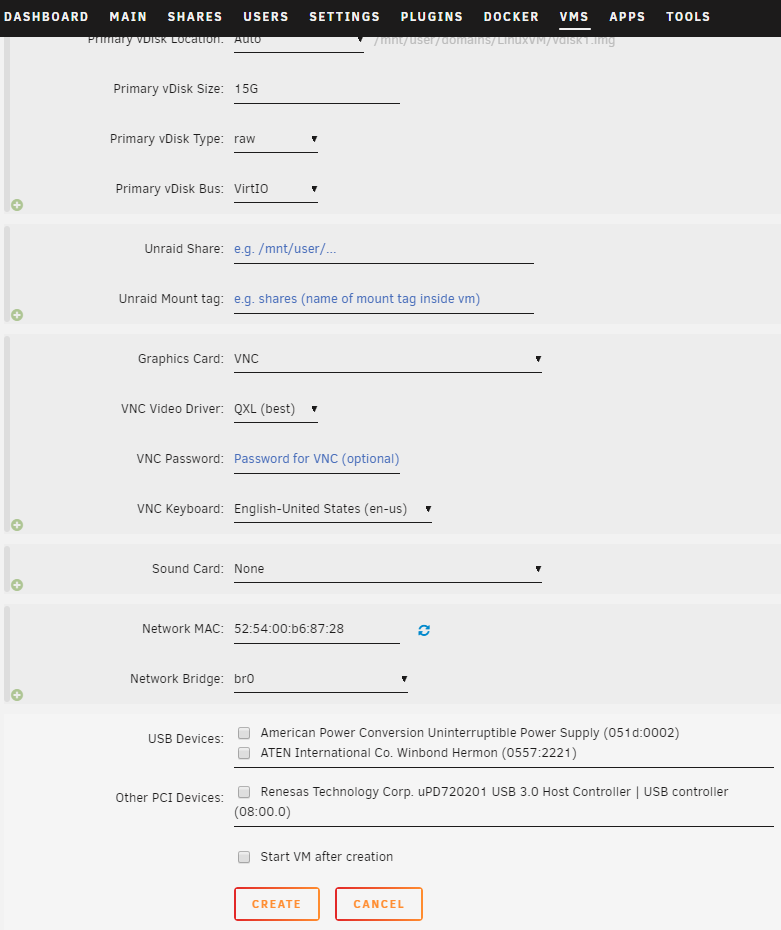
 Then we'll scroll to the bottom and deselect
 Start VM after creation because we still need to make one manual modification before the VM is started. We can now create the VM.
 After creation, we'll right click on the VM and select
 Edit. Then we'll switch to the XML View via toggle at the top right.
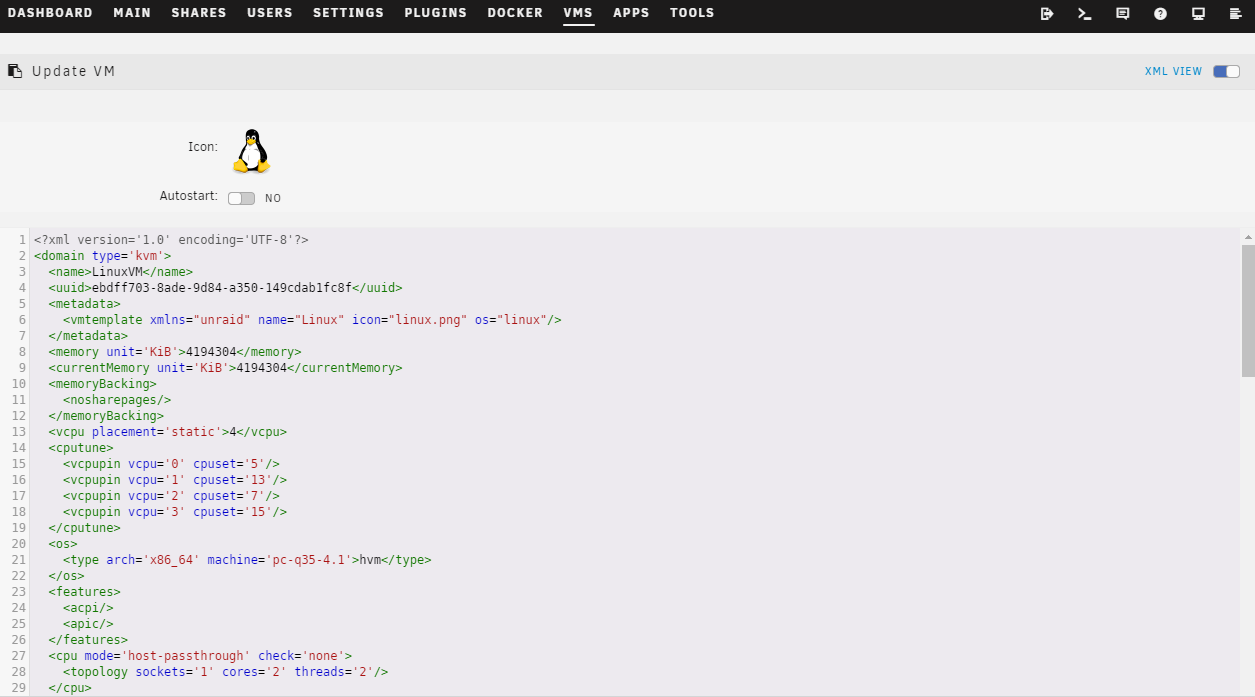 When we scroll down to the
 disk section, we can see that it has boot order defined as 1.
<disk type='file' device='disk'>
  <driver name='qemu' type='raw' cache='writeback'/>
  <source file='/mnt/user/domains/LinuxVM/vdisk1.img'/>
  <target dev='hdc' bus='virtio'/>
  <boot order='1'/>
  <address type='pci' domain='0x0000' bus='0x03' slot='0x00' function='0x0'/>
</disk>
However, there is no boot order defined for the network device. With the default settings, if SeaBIOS does not find a boot device, it will print an error and stall. We need to add a boot order to the network device as well, with a higher number than all the other drives so if SeaBIOS cannot find a boot drive, it will try network booting.
<interface type='bridge'>
  <mac address='52:54:00:b6:87:28'/>
  <source bridge='br0'/>
  <model type='virtio'/>
  <boot order='2'/>
  <address type='pci' domain='0x0000' bus='0x01' slot='0x00' function='0x0'/>
</interface>
Here, since we only have one drive, we add a boot order 2 right under the model type for the network interface (add just that one line). Now we can hit Update and save the configuration. When the VM is started, it should boot netboot.xyz. After a distribution is installed to disk, the VM will no longer network boot and instead will boot from disk as its boot order is 1.
If you have multiple disks attached, unraid will have multiple boot order statements in the XML. Make sure that you check for all boot orders and assign a unique and higher number to the network device.
Keep in mind that every time you edit and save the VM config in "FORM View", the boot order assigned to the network device will disappear and will need to be re-added in "XML View".